
 Manual Mid-Flight Workflow
Finish a DocuSign-linked Opportunity
An existing Opportunity that was previously linked to DocuSign cannot be connected or resynced to Lone Wolf. Keep the original Command Opportunity. When new paperwork needs signatures, create a separate transaction manually in Lone Wolf Transact, send the signing through Authentisign, then download the completed documents and upload them to the original Opportunity in Command.
The Rule for This File
Do not try to connect the existing Opportunity
The DocuSign connection on this Opportunity prevents it from being connected to Lone Wolf. Do not create a duplicate Command Opportunity and do not expect the existing file to sync. Follow the manual workflow below whenever additional paperwork needs to be prepared or signed.
Start Here
DocuSign to Lone Wolf game plan
This is the mid-flight game plan created before the changeover, now paired with the current manual signing path. It applies when an existing Command Opportunity was linked to DocuSign and still needs new paperwork or signatures.
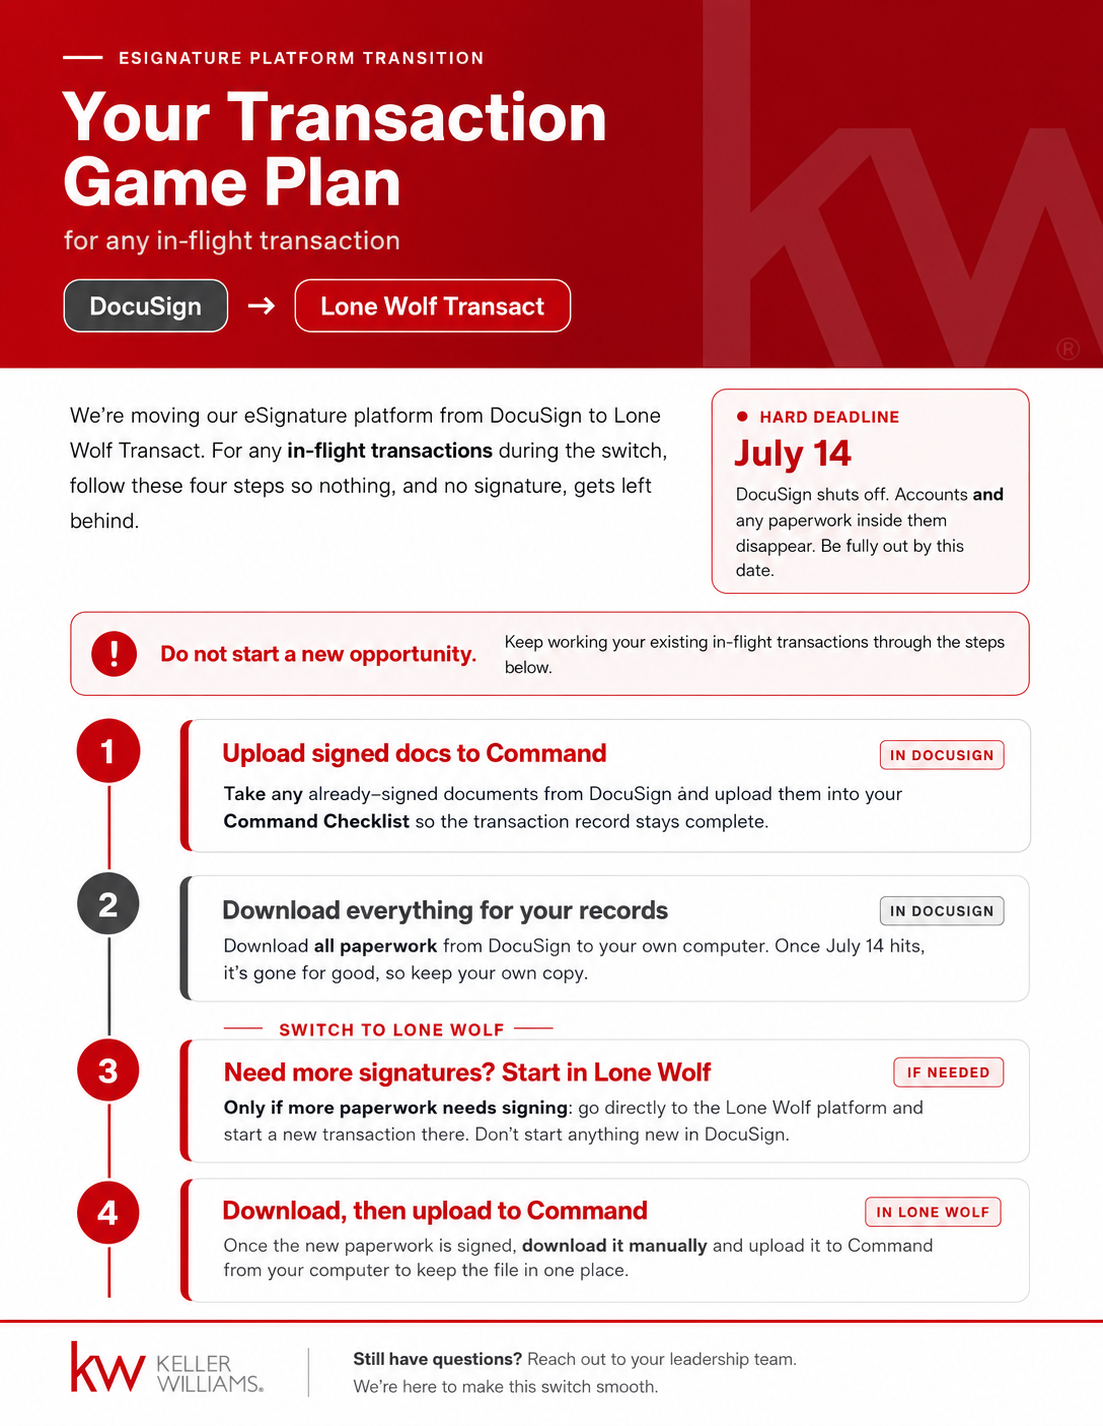
Manual Workflow
Create and send the signing manually
Use this listing example when a previously DocuSign-linked Opportunity needs new paperwork signed. Start from the Agent Portal, build a separate manual Lone Wolf transaction, prepare and send the forms through Authentisign, then return the executed documents to the original Command Opportunity for Market Center review.
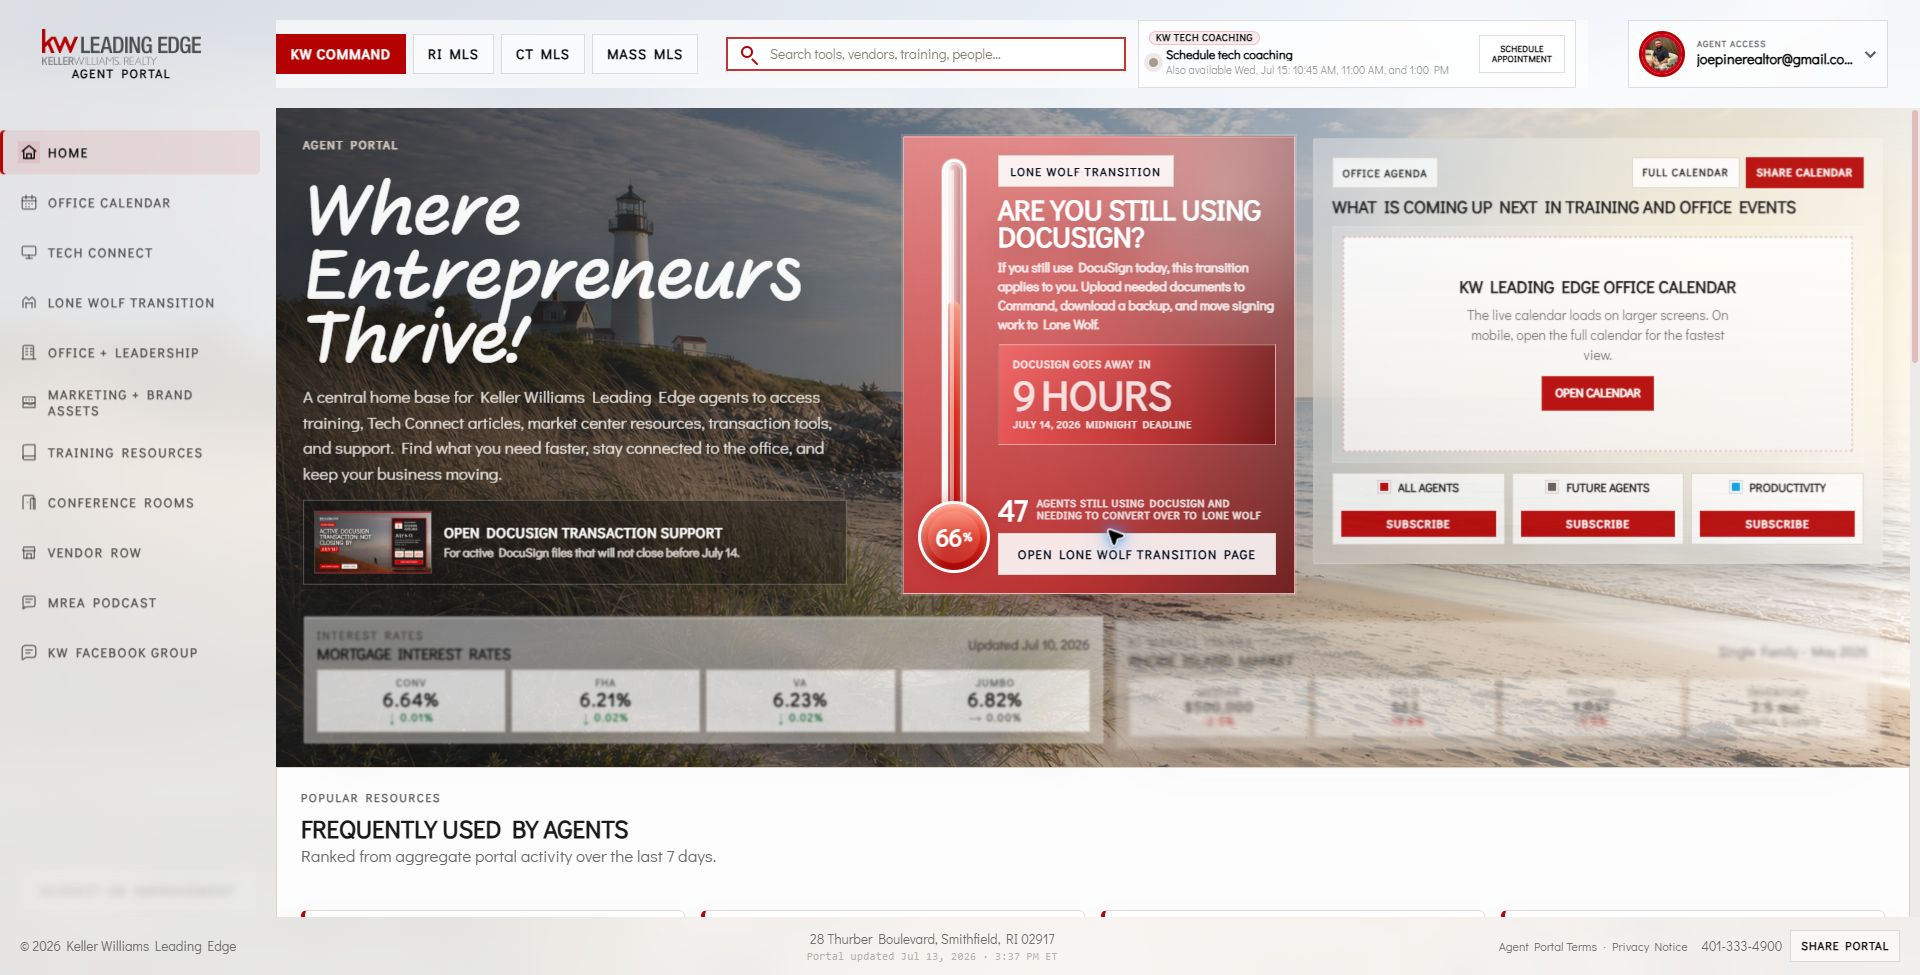
Open KW Command from the Agent Portal
From the KW Leading Edge Agent Portal, click KW Command in the daily-tools bar.
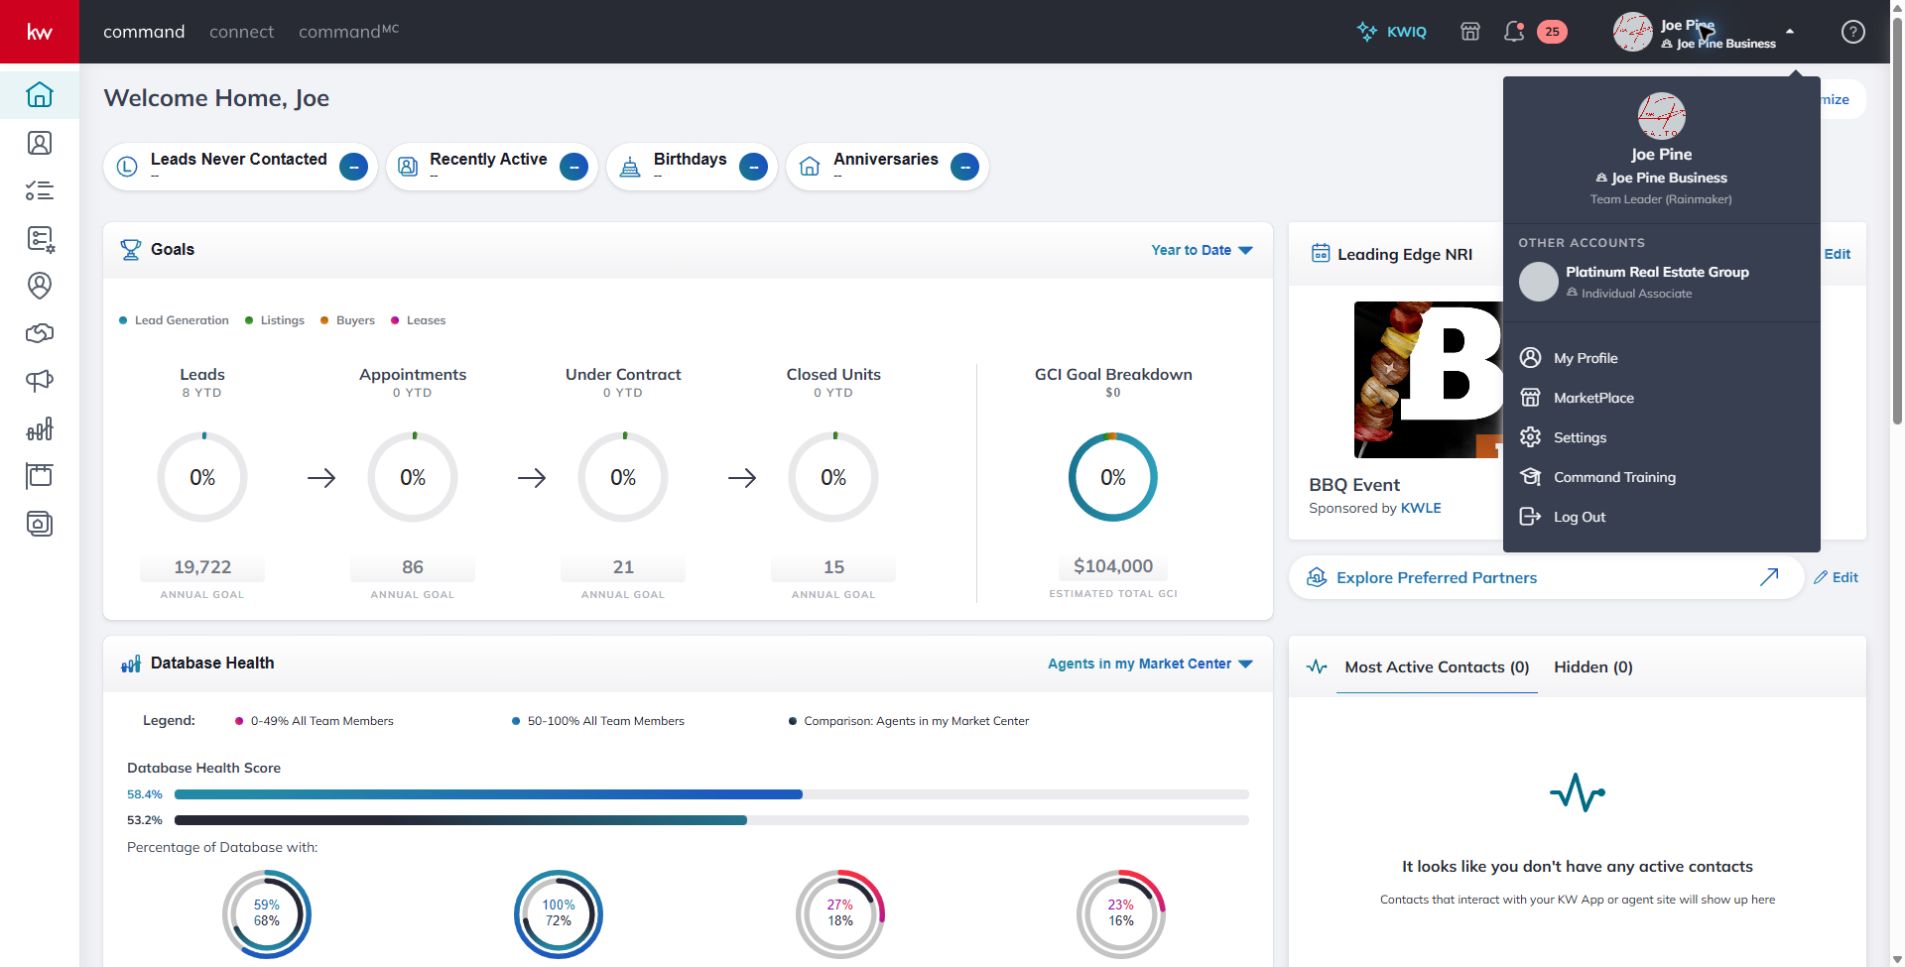
Open Command Settings
Click your name in the upper-right corner, then choose Settings.
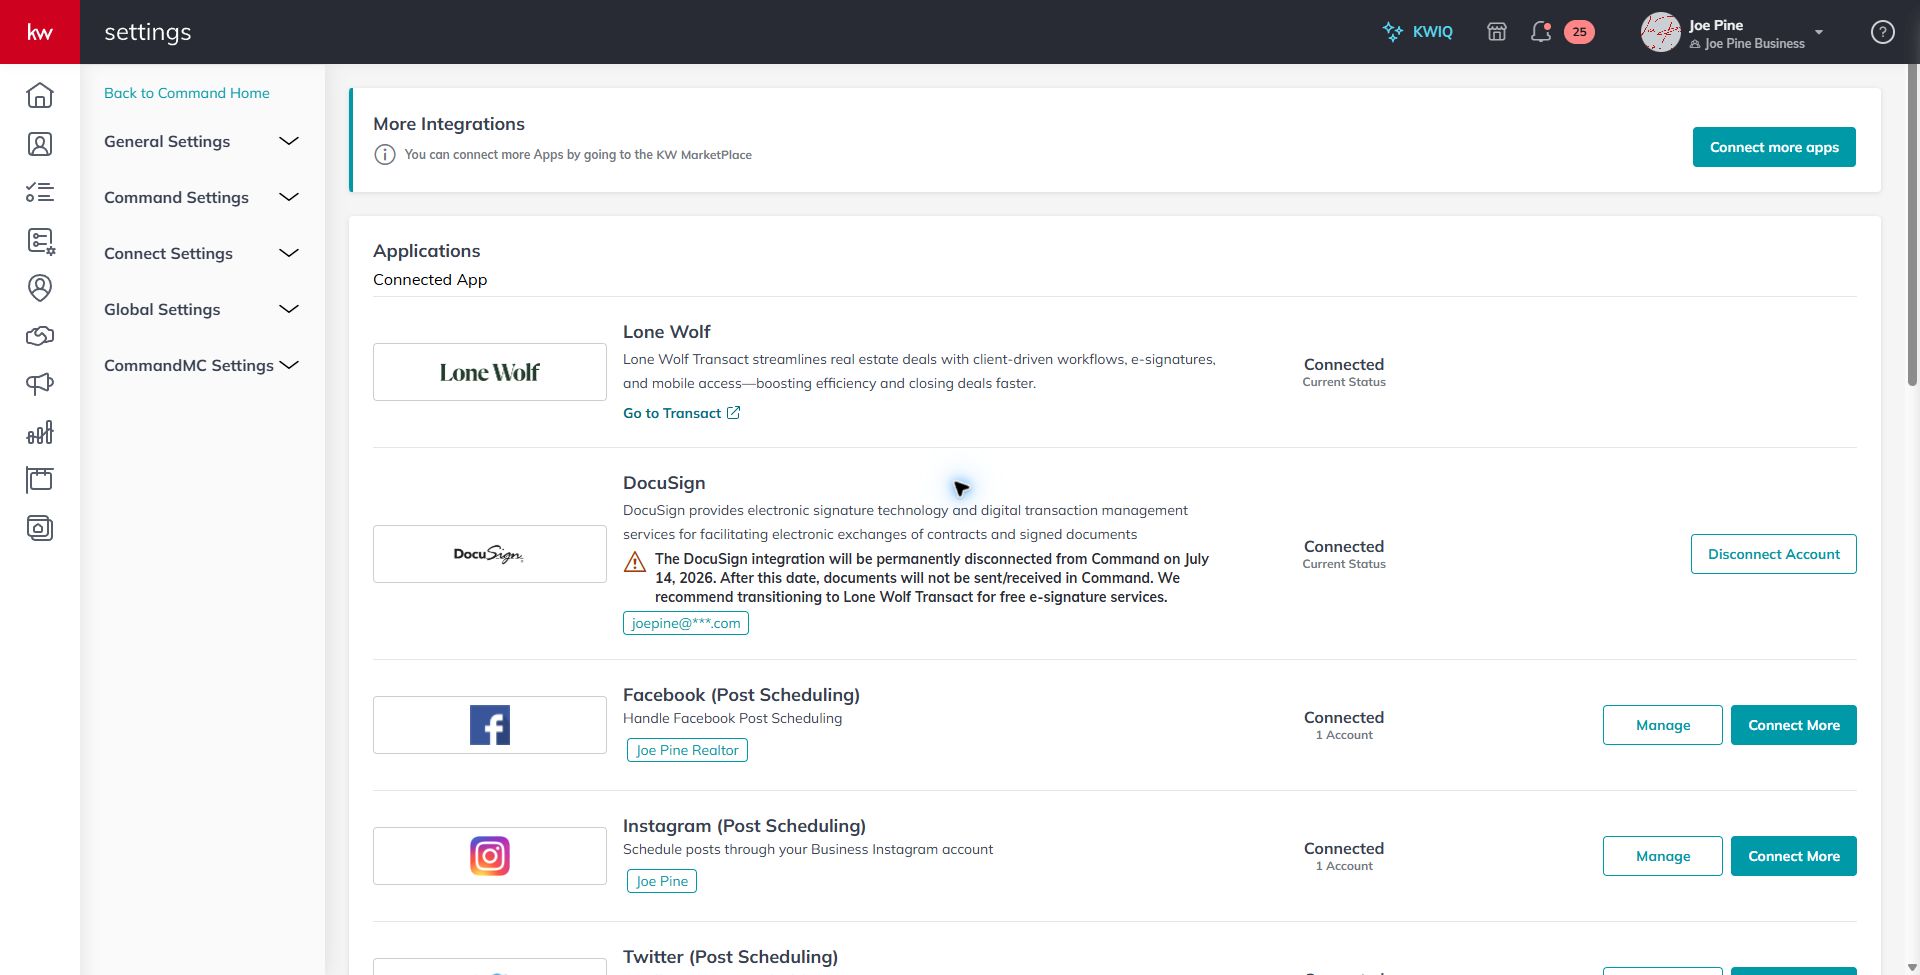
Find Lone Wolf and click Go to Transact
Scroll through Applications to Lone Wolf, then click Go to Transact.
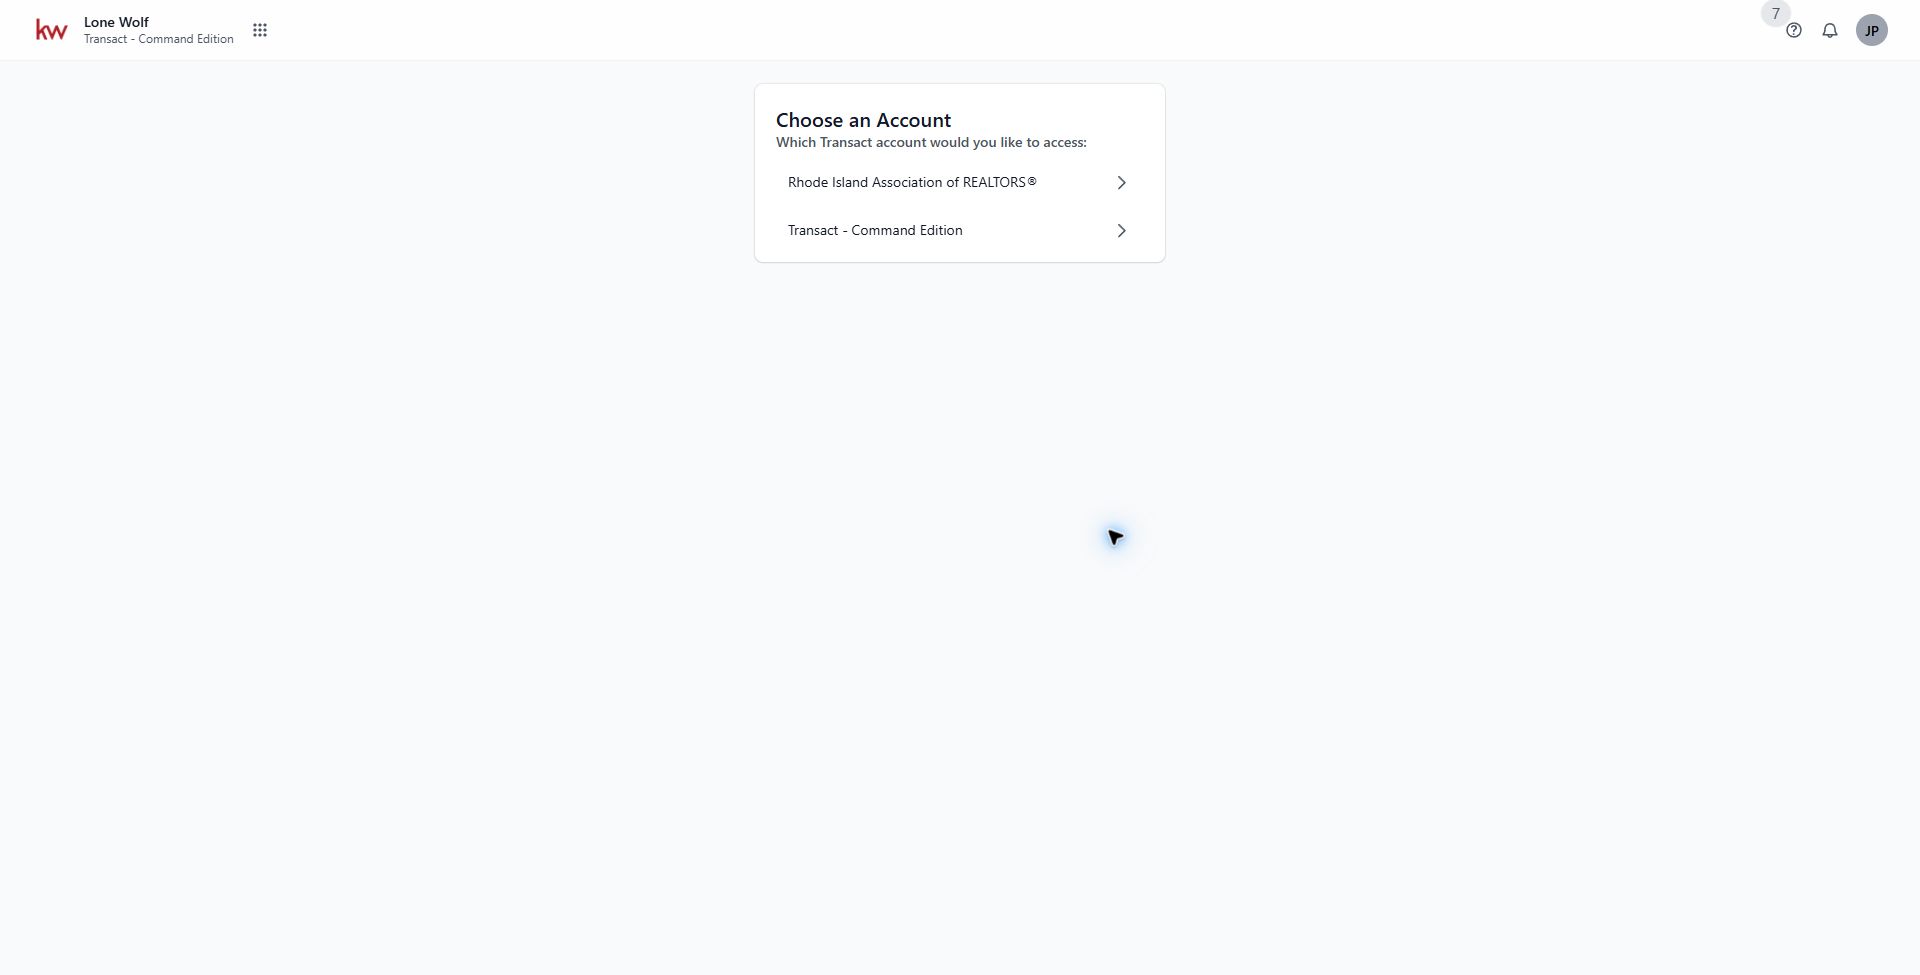
Choose Transact - Command Edition
If the account picker appears, select Transact - Command Edition.
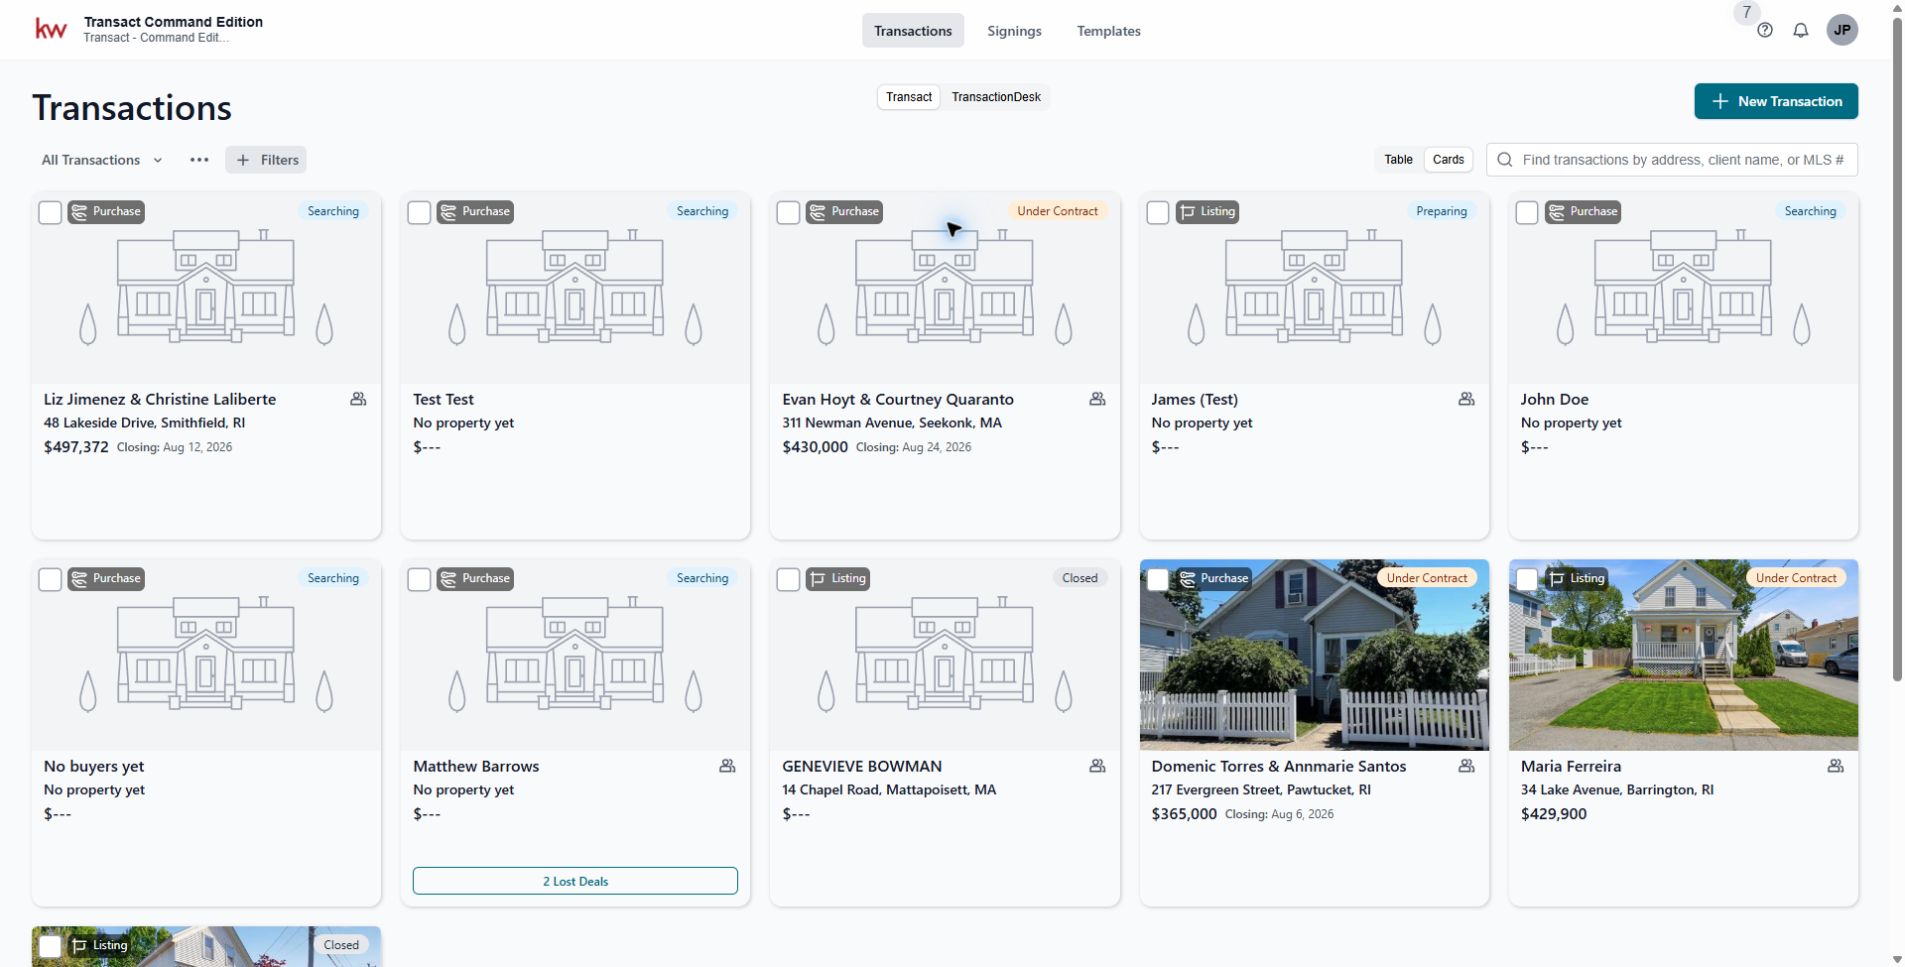
Start a new transaction
On the Transactions page, click New Transaction.
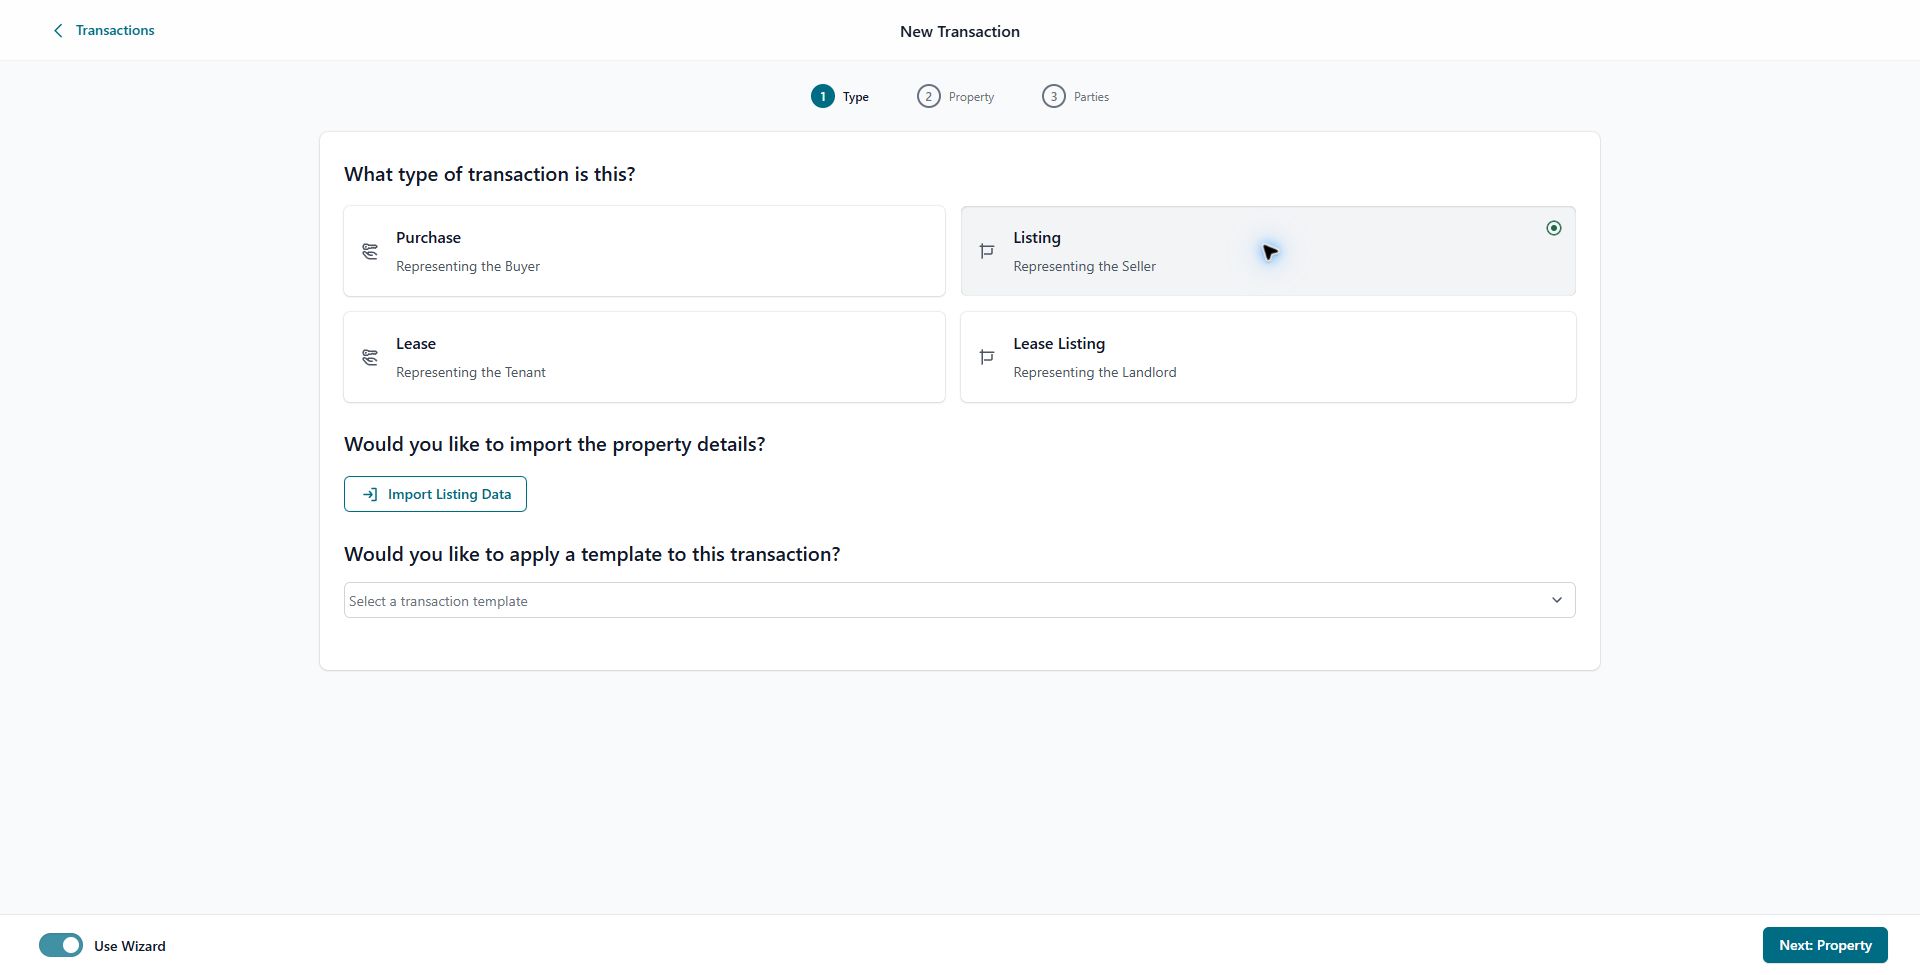
Select the transaction type
Choose Purchase, Listing, Lease, or Lease Listing. This example uses Listing. Keep Use Wizard selected, then click Next: Property.
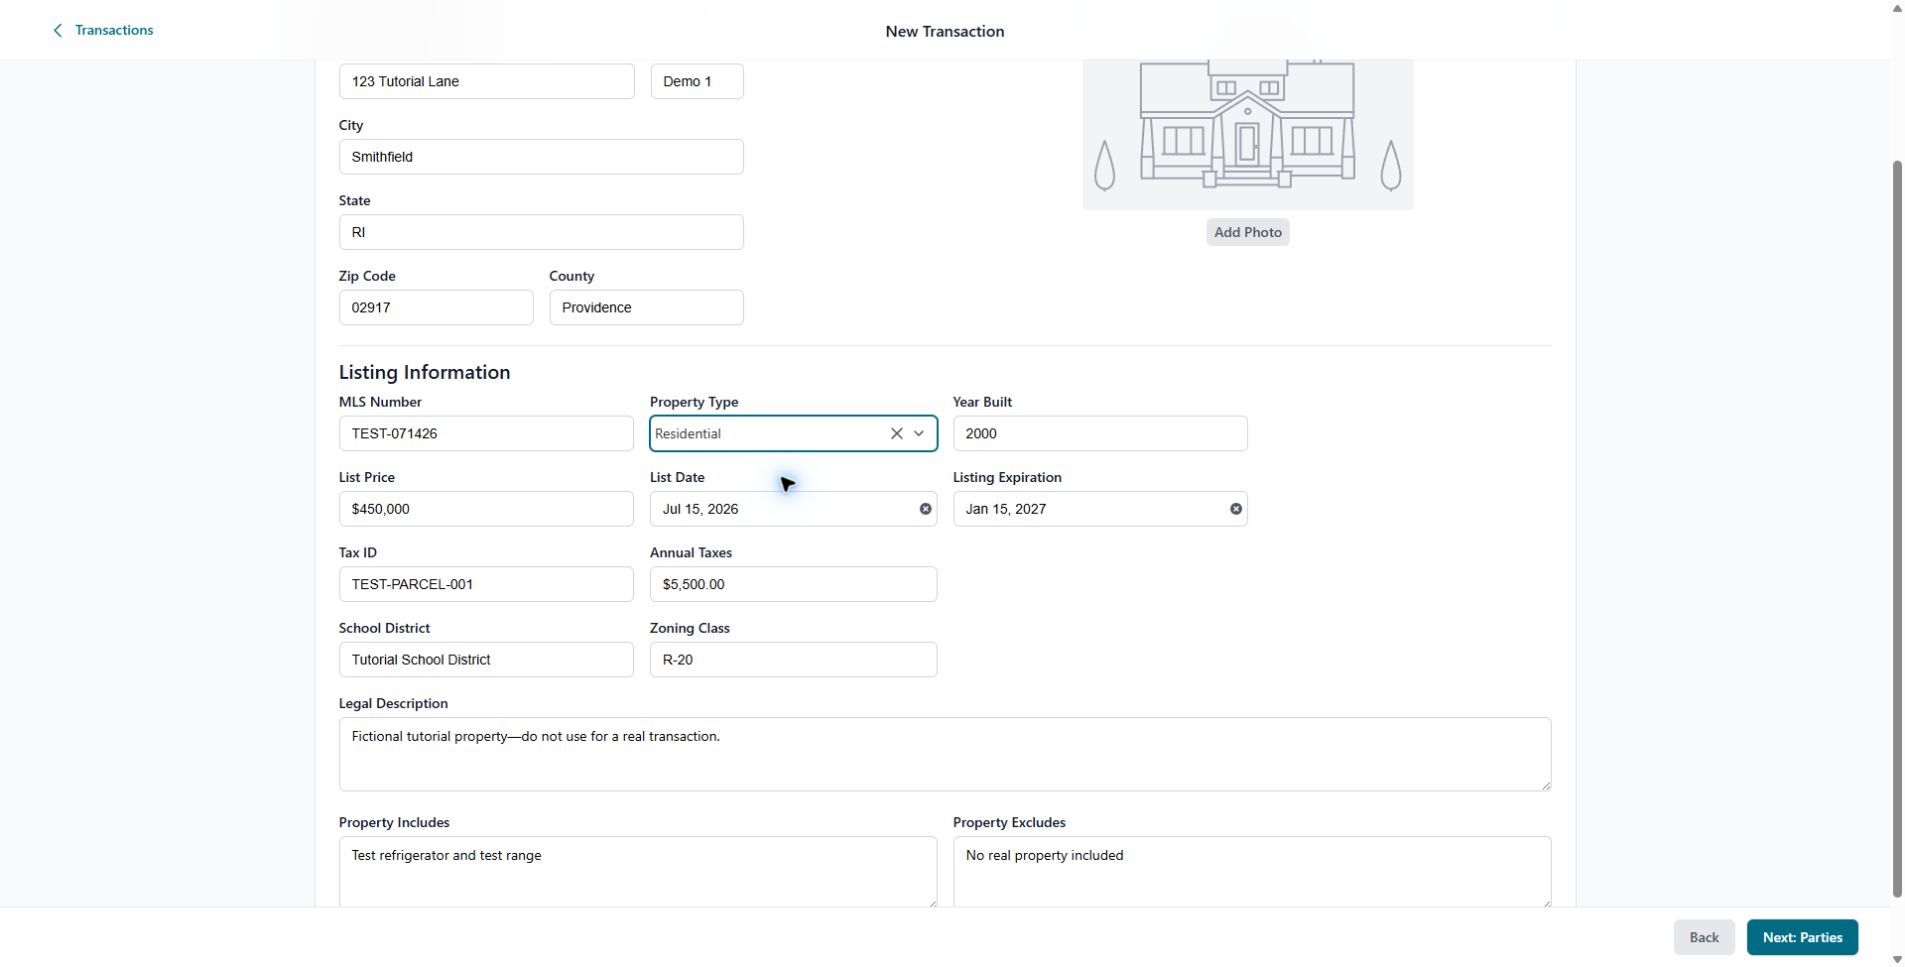
Enter property and listing information
Manually enter the property details because this new Transact file is not synced from the older DocuSign-connected Opportunity.
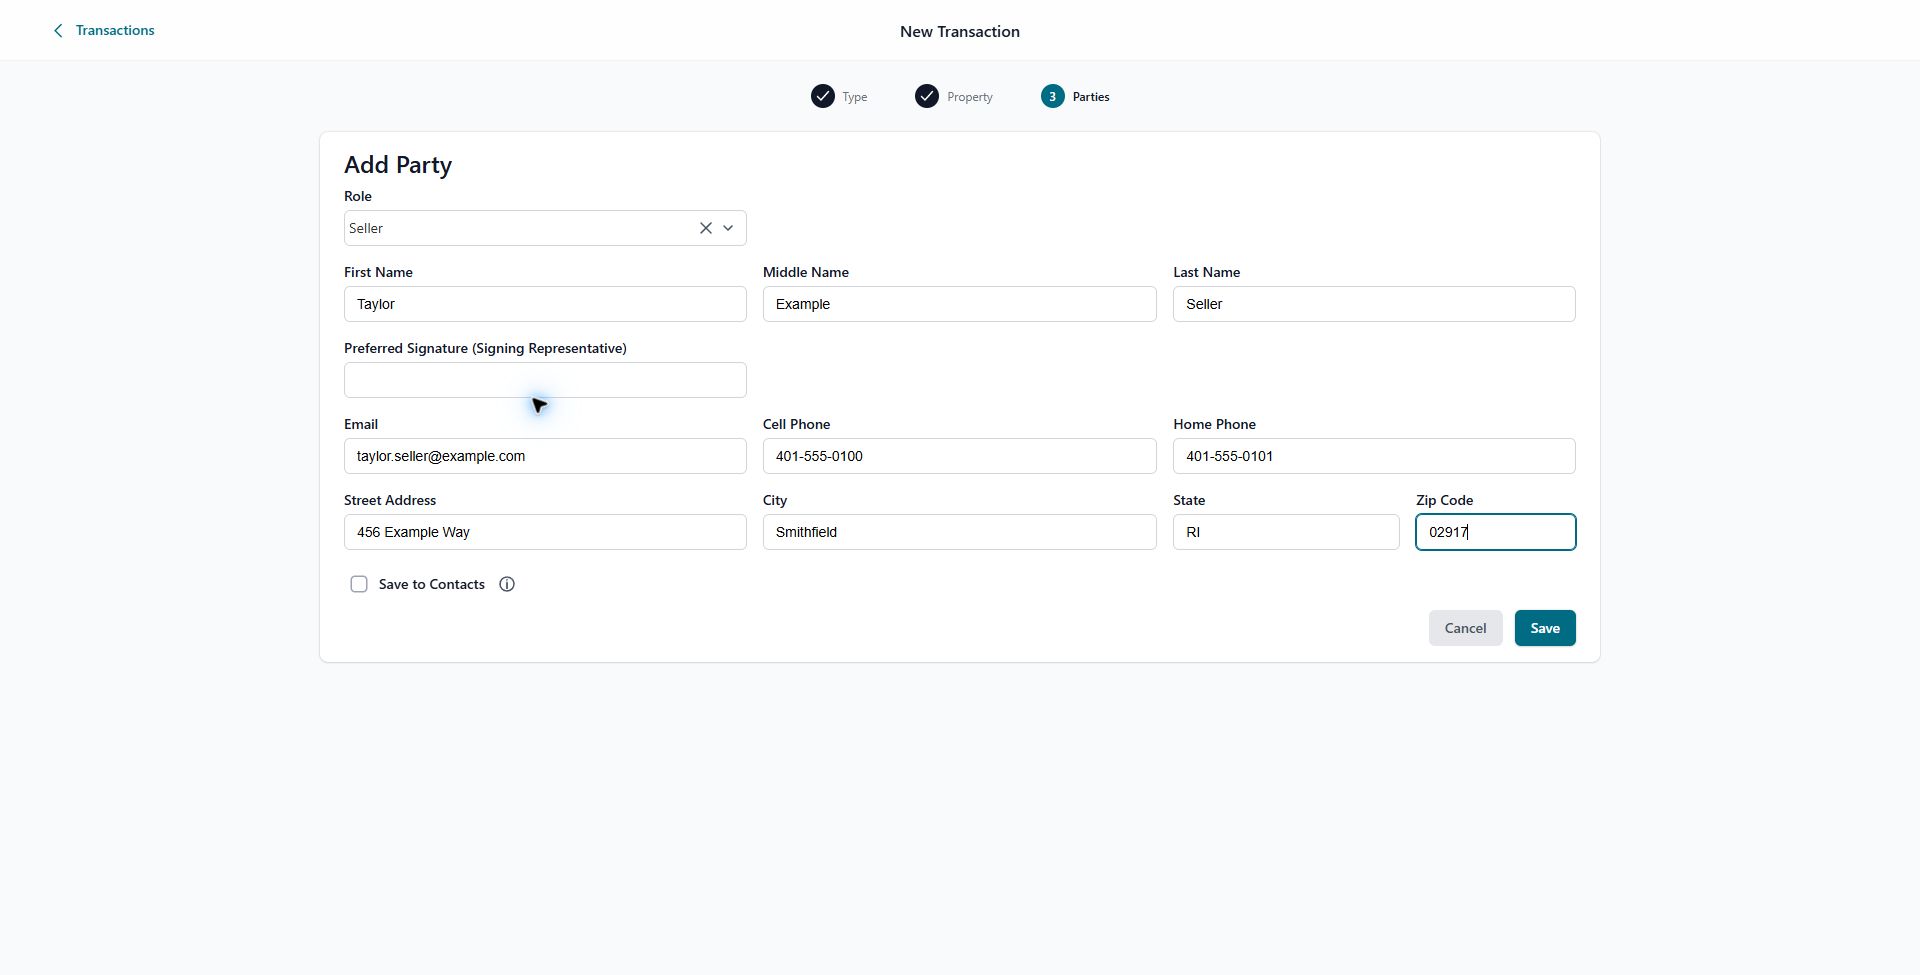
Add the transaction parties
Click Next: Parties. Add each seller or other required party, choose the correct role, enter their contact information, and save.
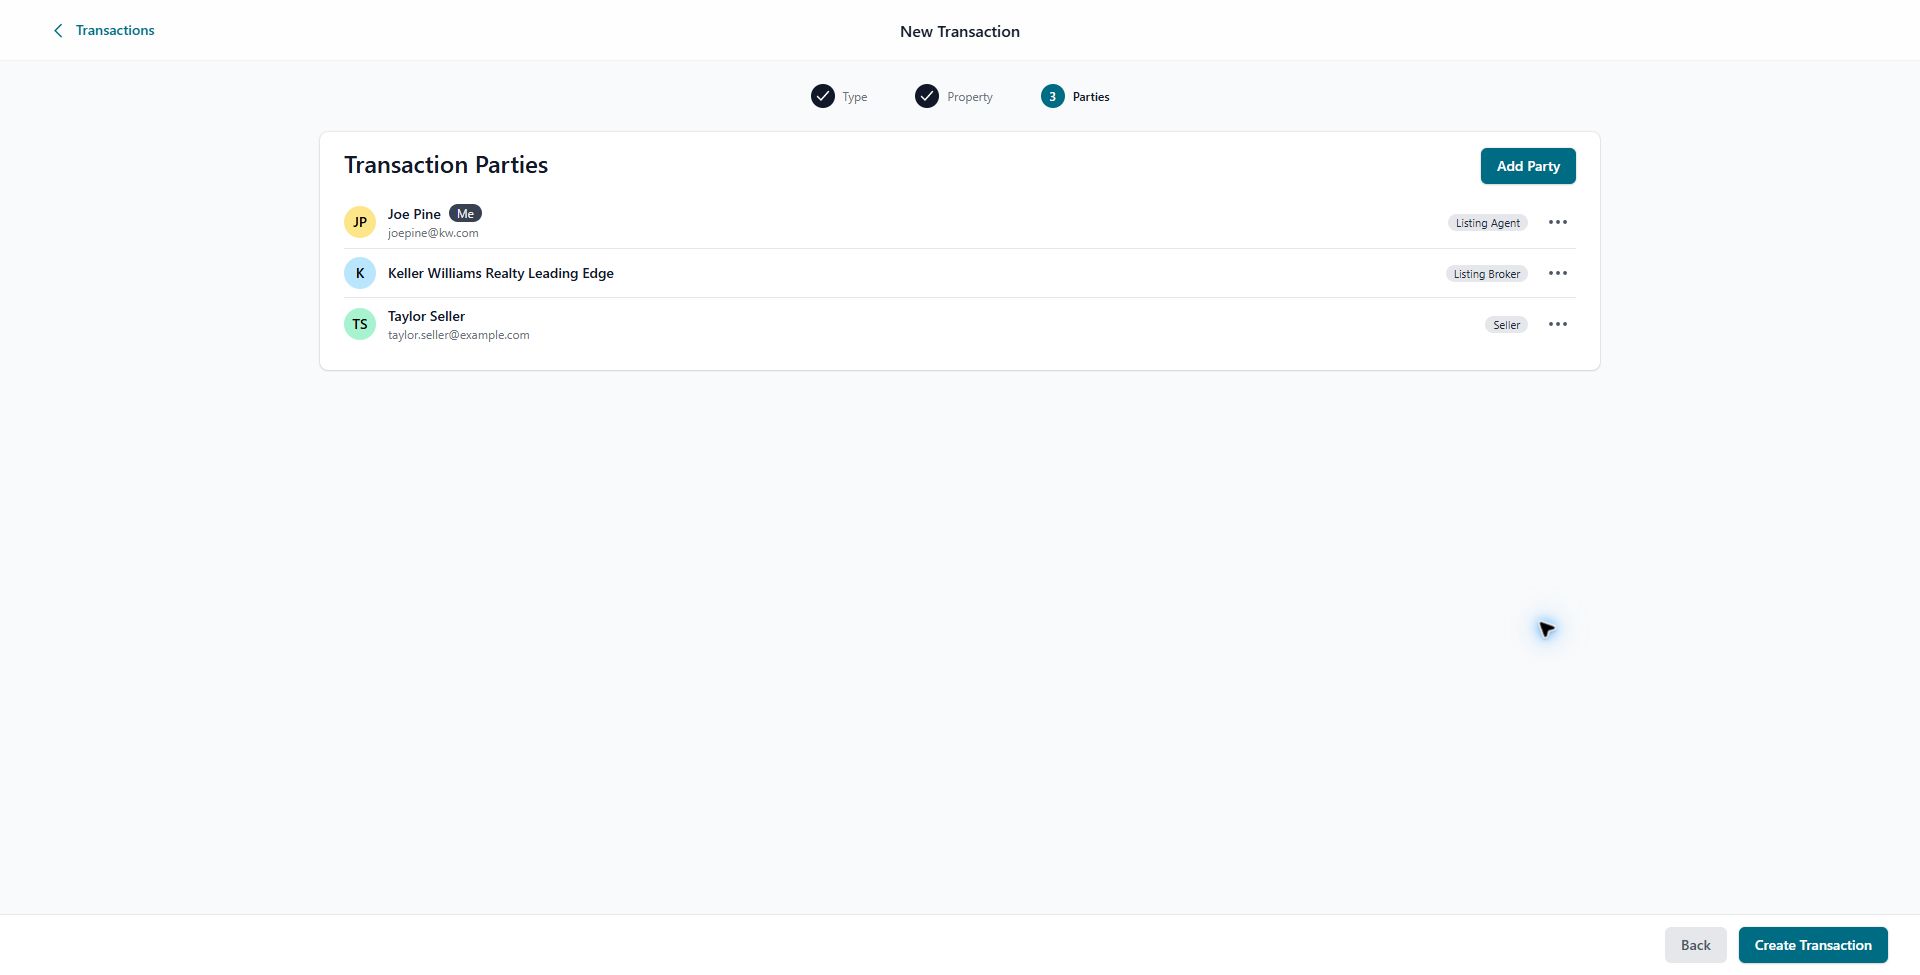
Create the transaction
Review the parties, then click Create Transaction.
Add paperwork
On the transaction's Paperwork tab, click Add Paperwork and leave Form Libraries selected.
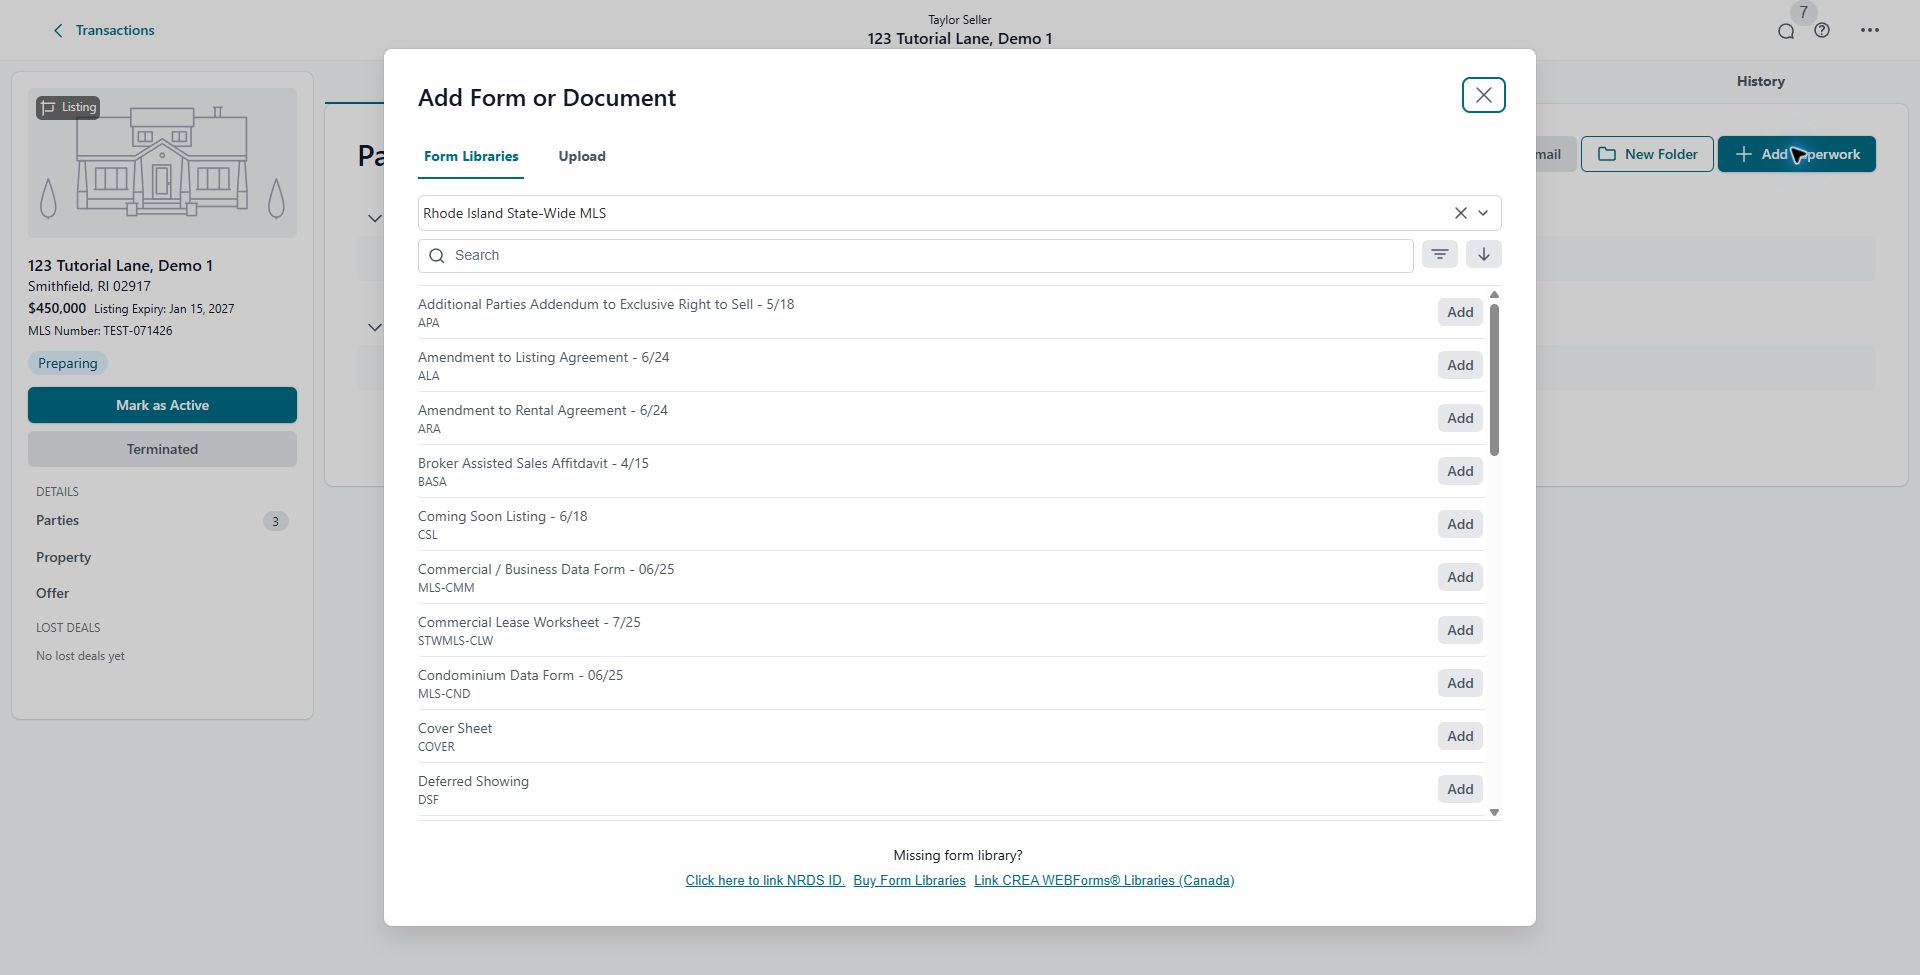
Add the forms you need
Search the correct library and click Add for each form. This listing example uses the large-font Exclusive Right to Sell agreement and Single Family Data Form.
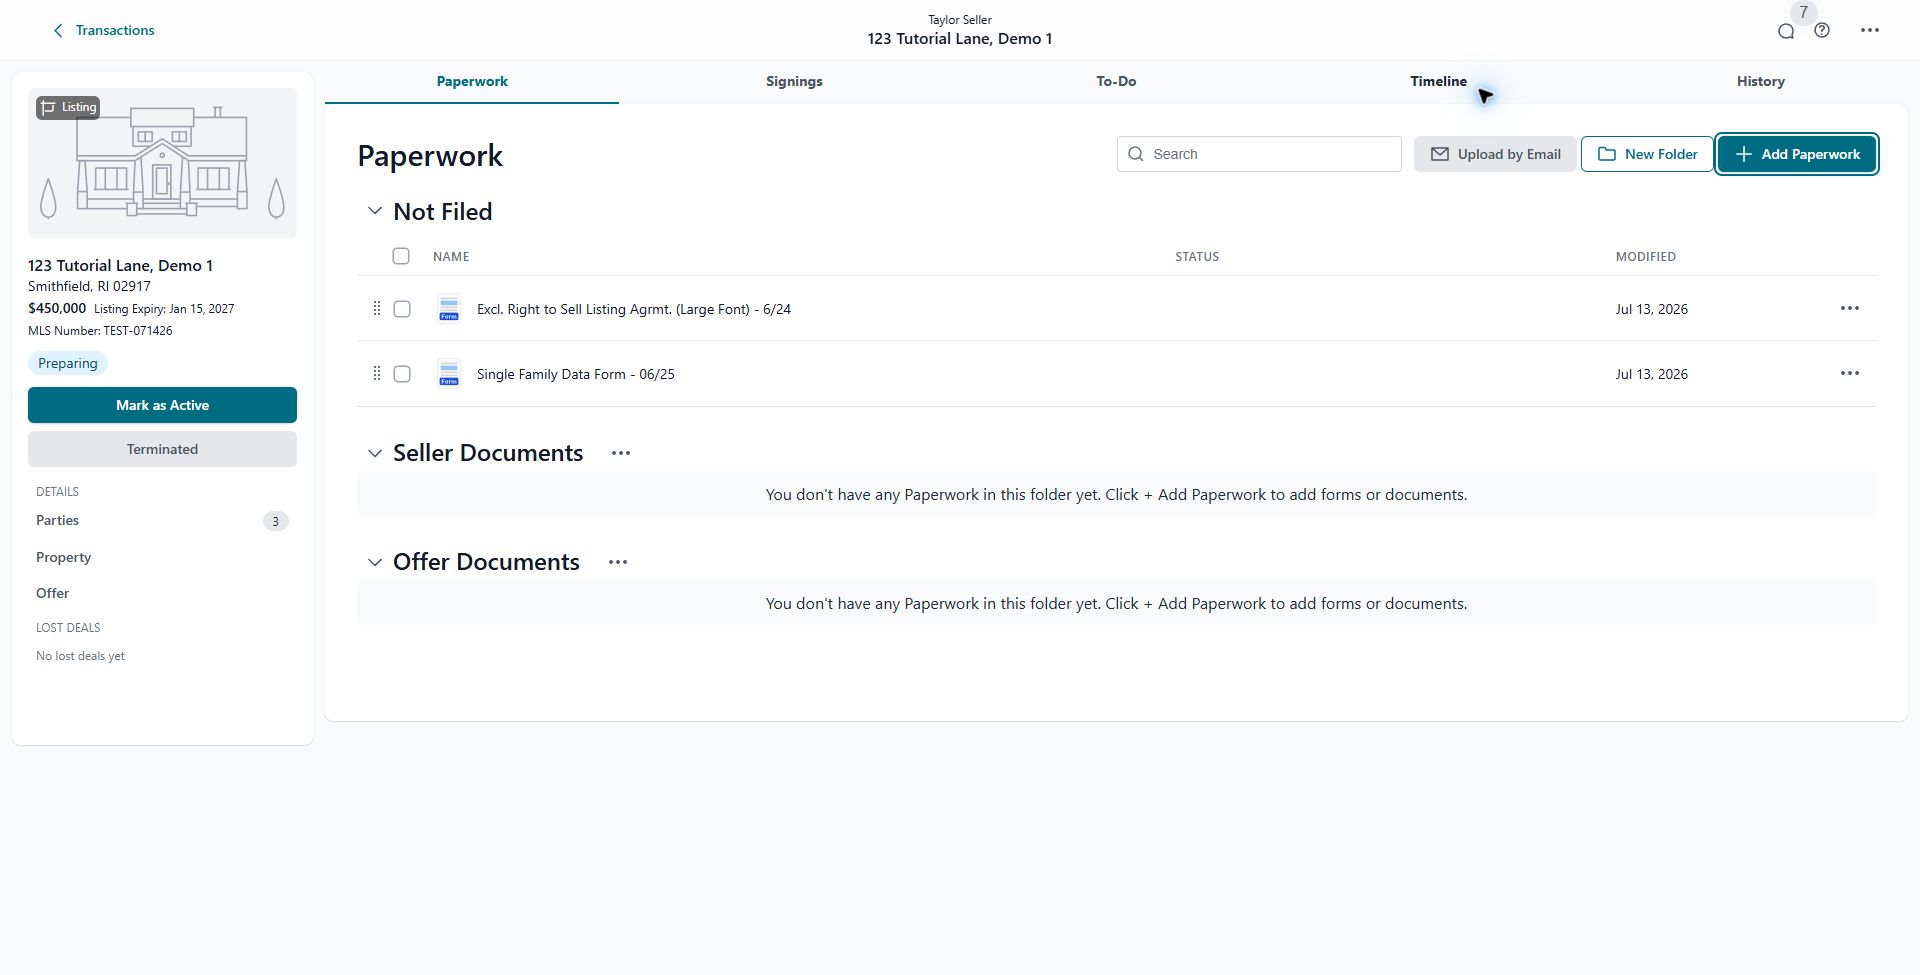
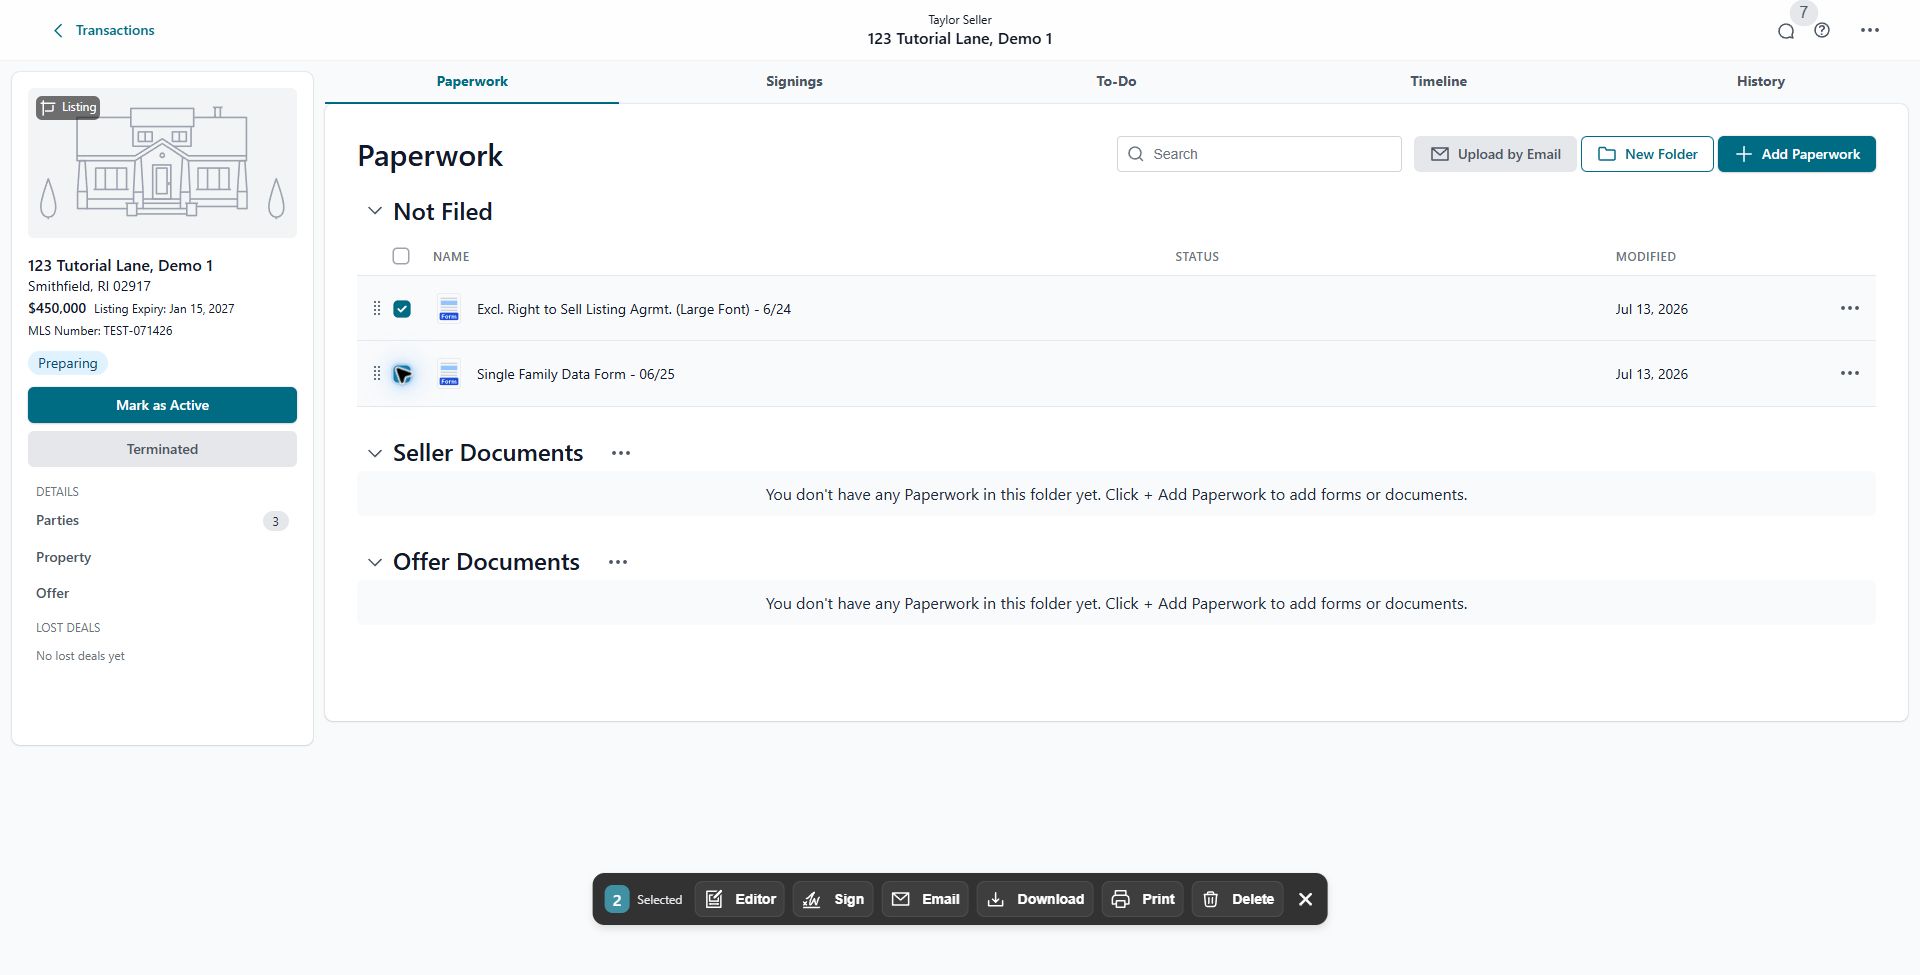
Select the forms and open Editor
Check the forms that belong in the signing package, then choose Editor from the Actions toolbar.
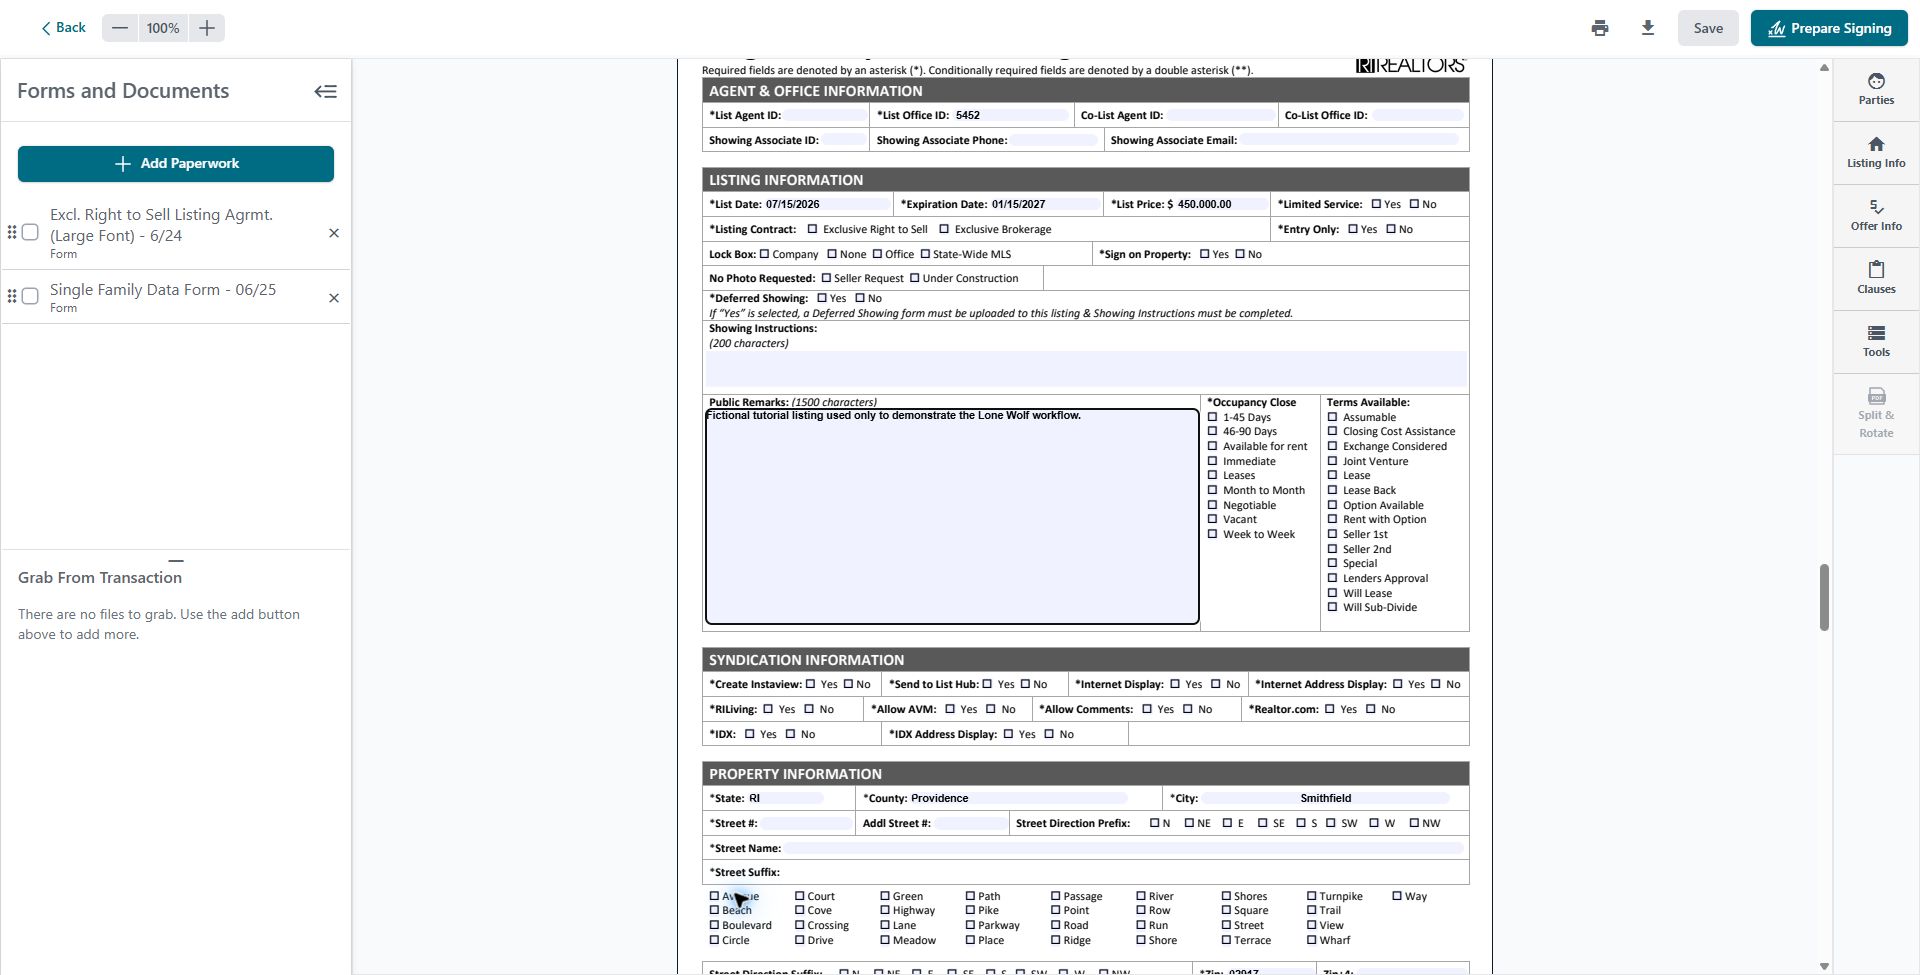
Complete and review the forms
Review every page, complete the required fields, and confirm the transaction information. Click Save, then Prepare Signing.
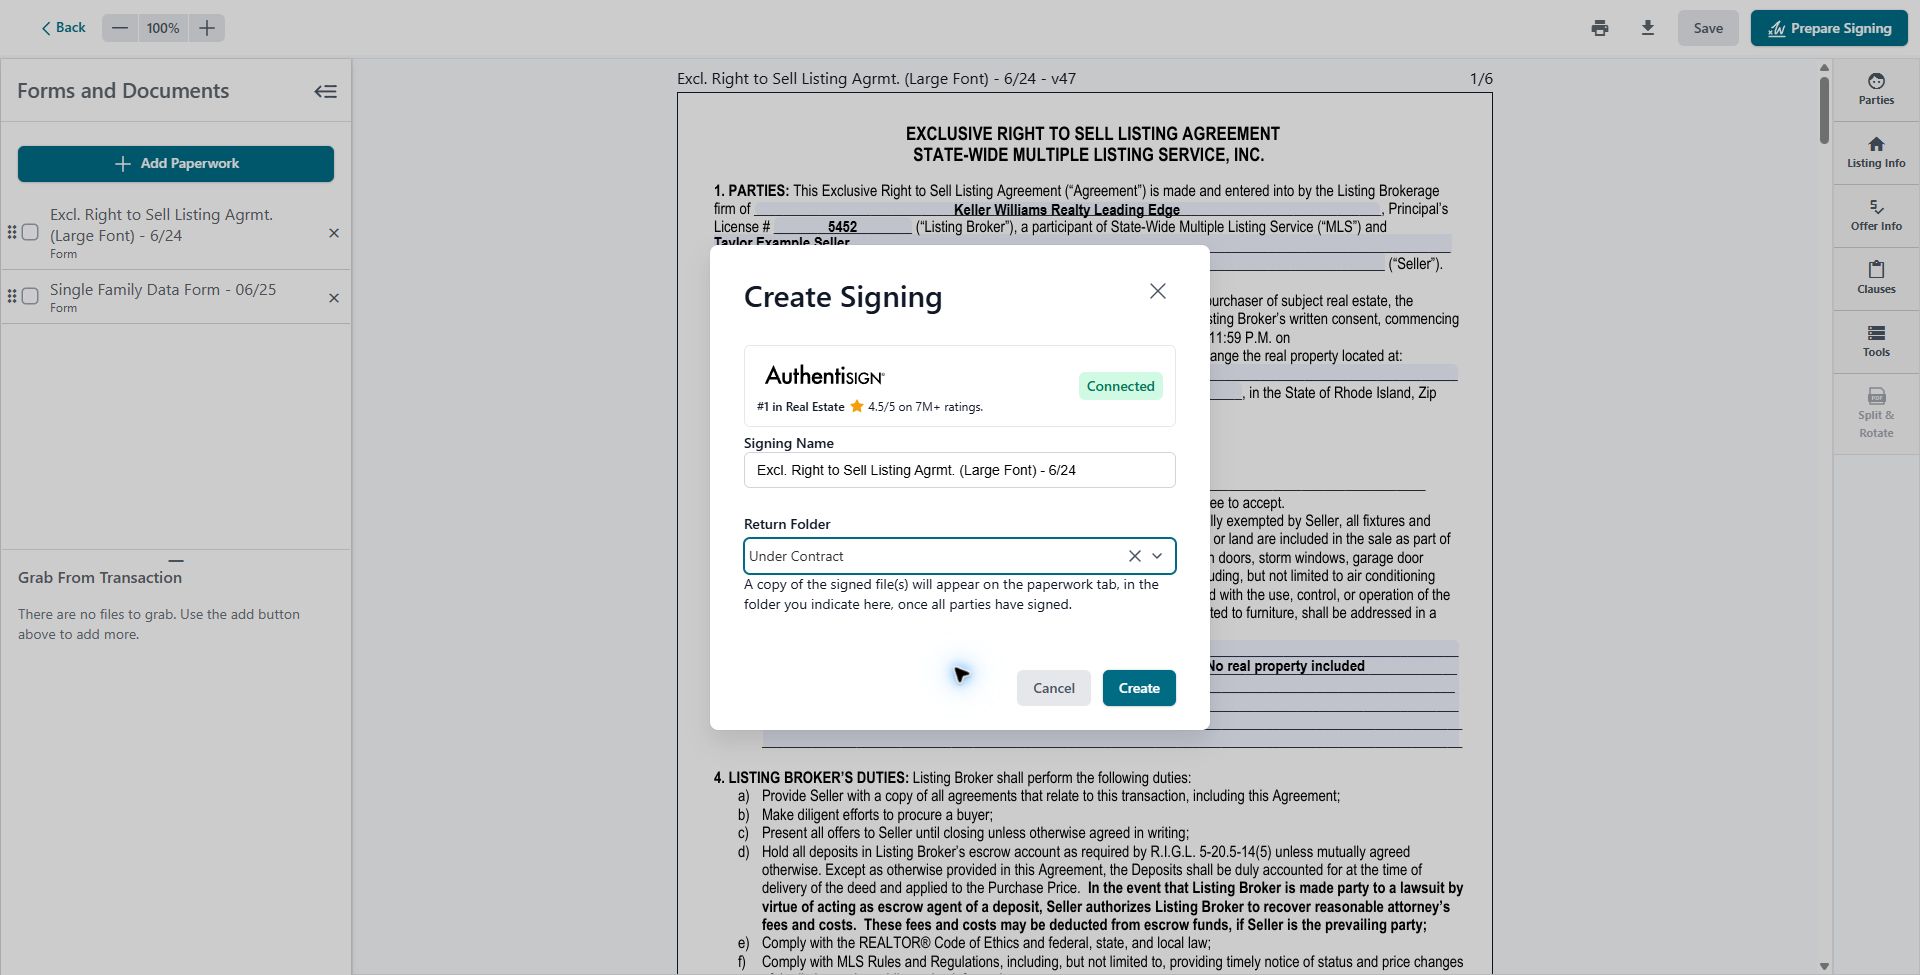
Name the signing and choose its return folder
Choose the folder where the fully signed copy should return. This example uses an Under Contract folder.
Add the signing participants
In Authentisign, use Add Participants to add each signer and the agent. Confirm names, email addresses, roles, and signer types.
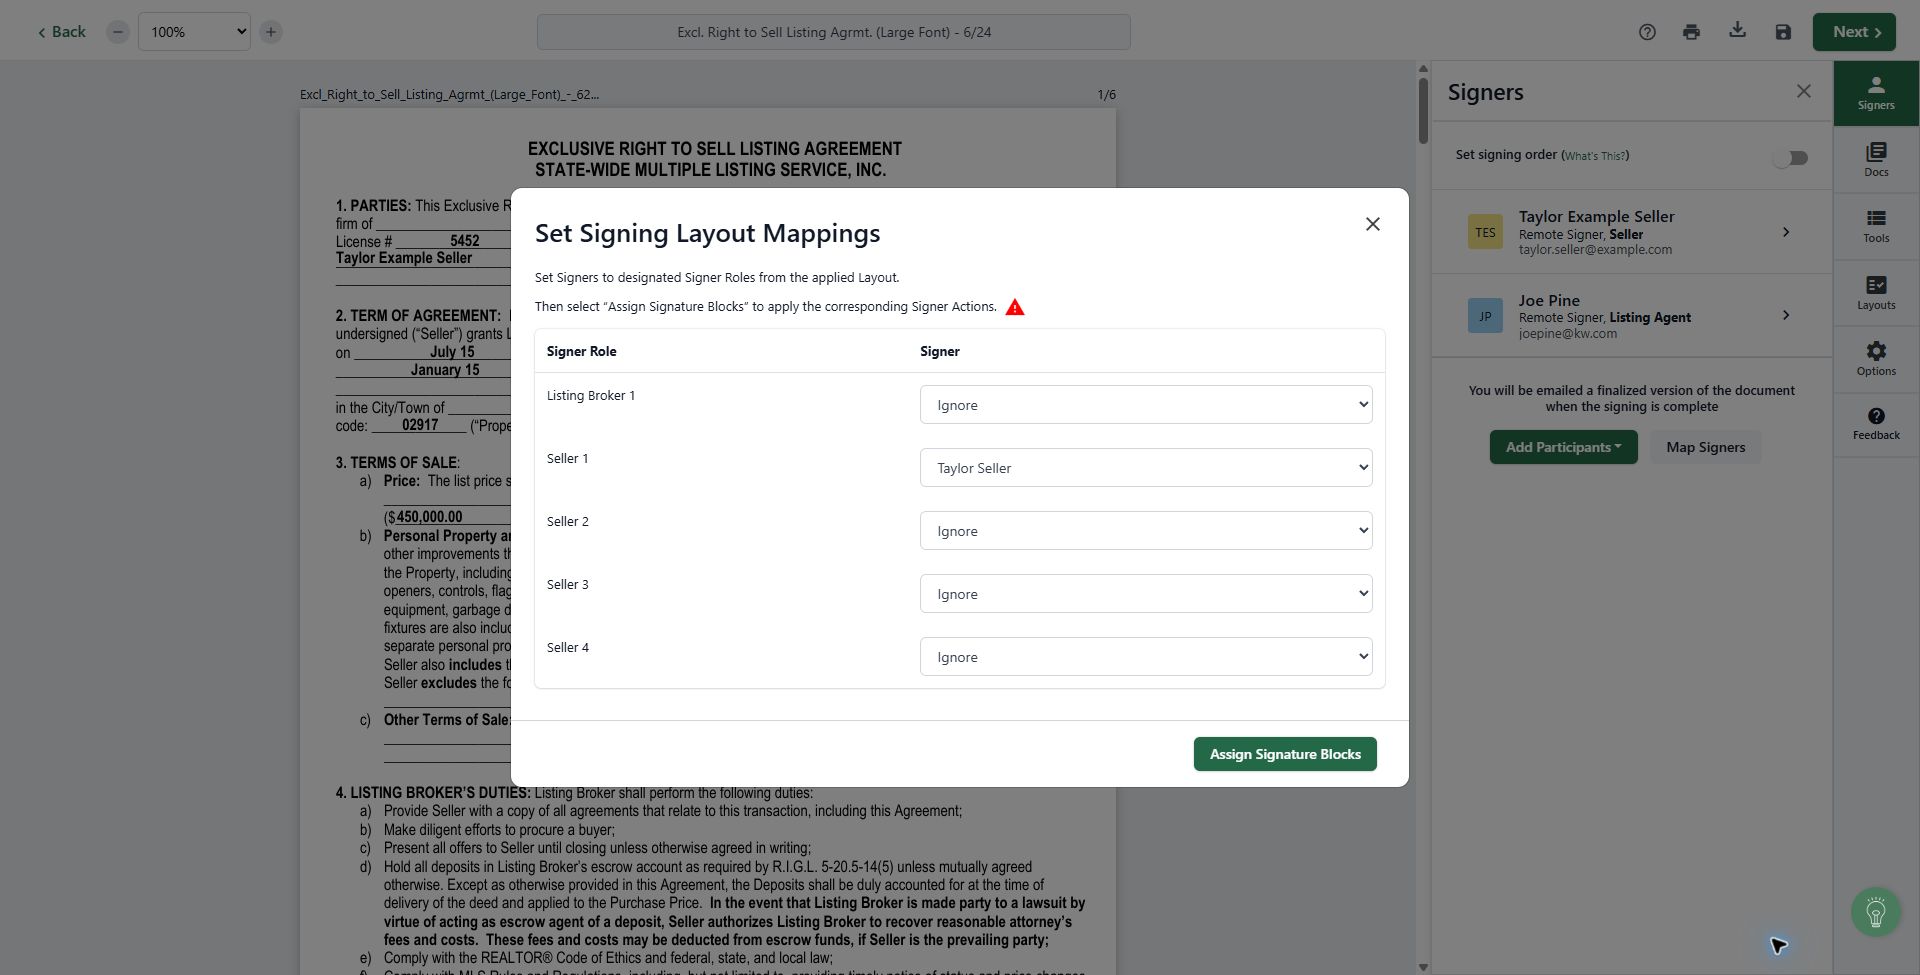
Map each signer role
Click Map Signers. Assign the seller to Seller 1 and the agent to Listing Broker 1, then click Assign Signature Blocks.
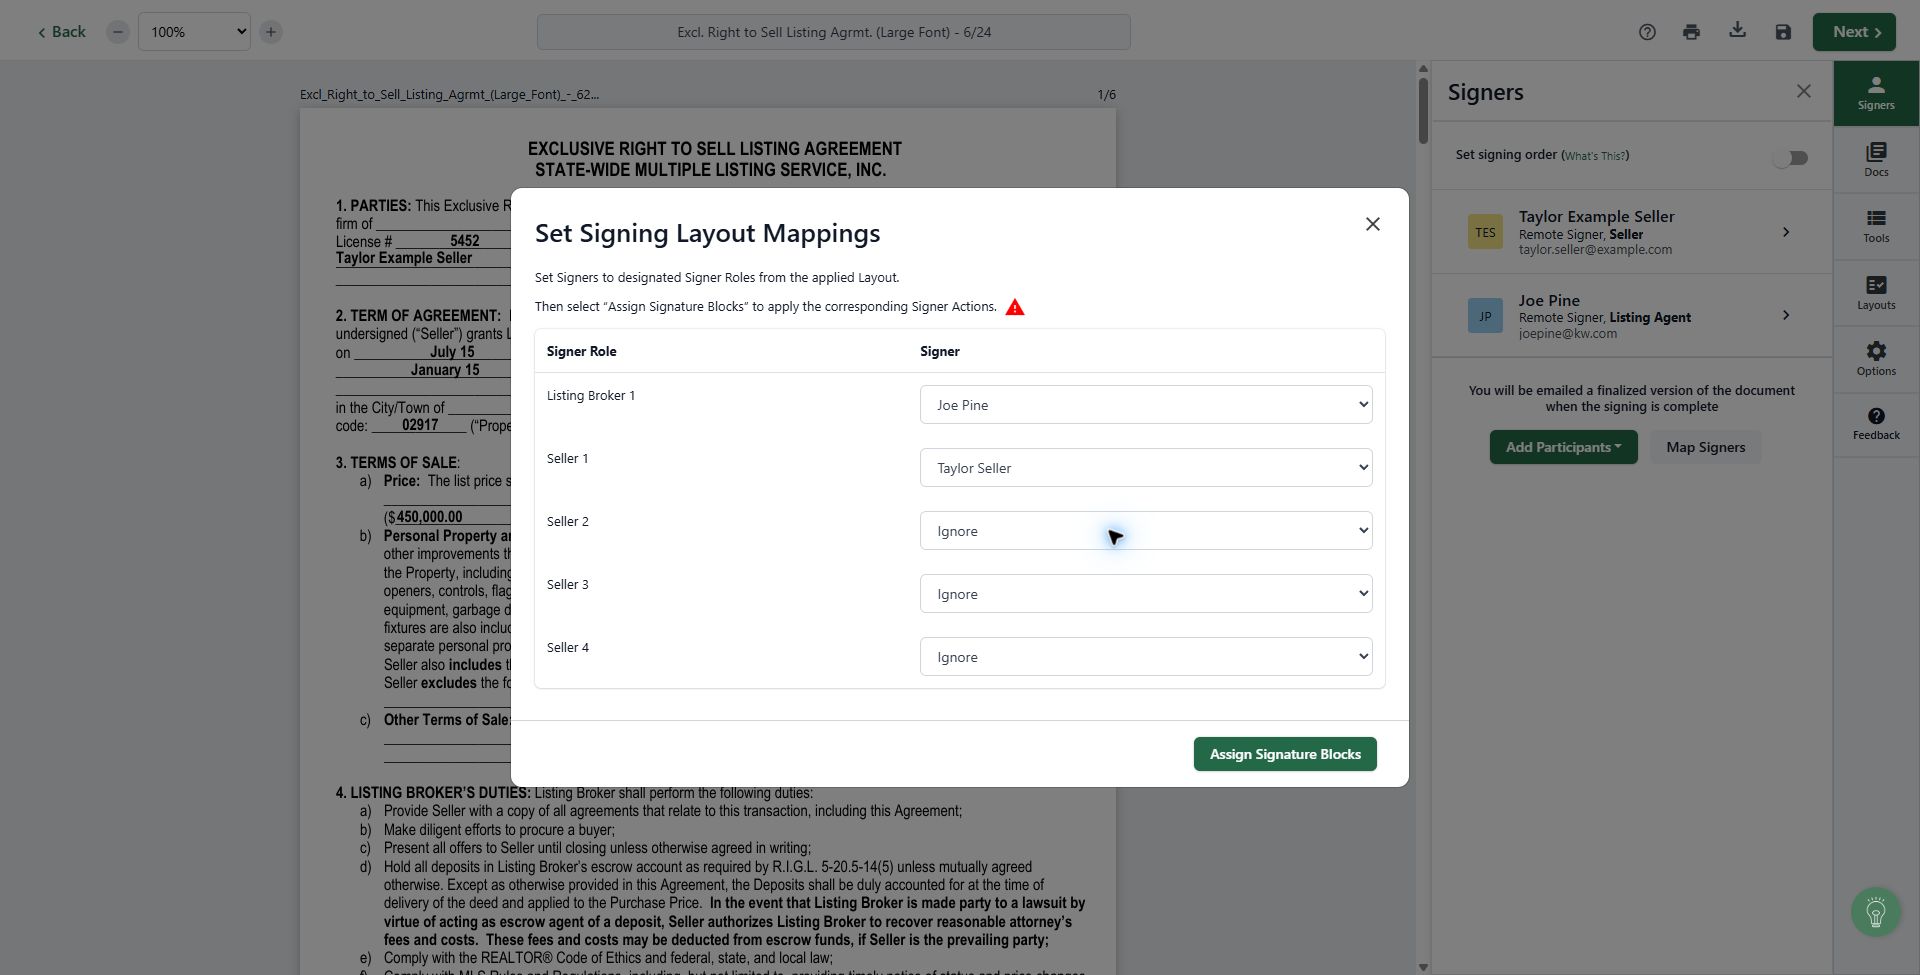
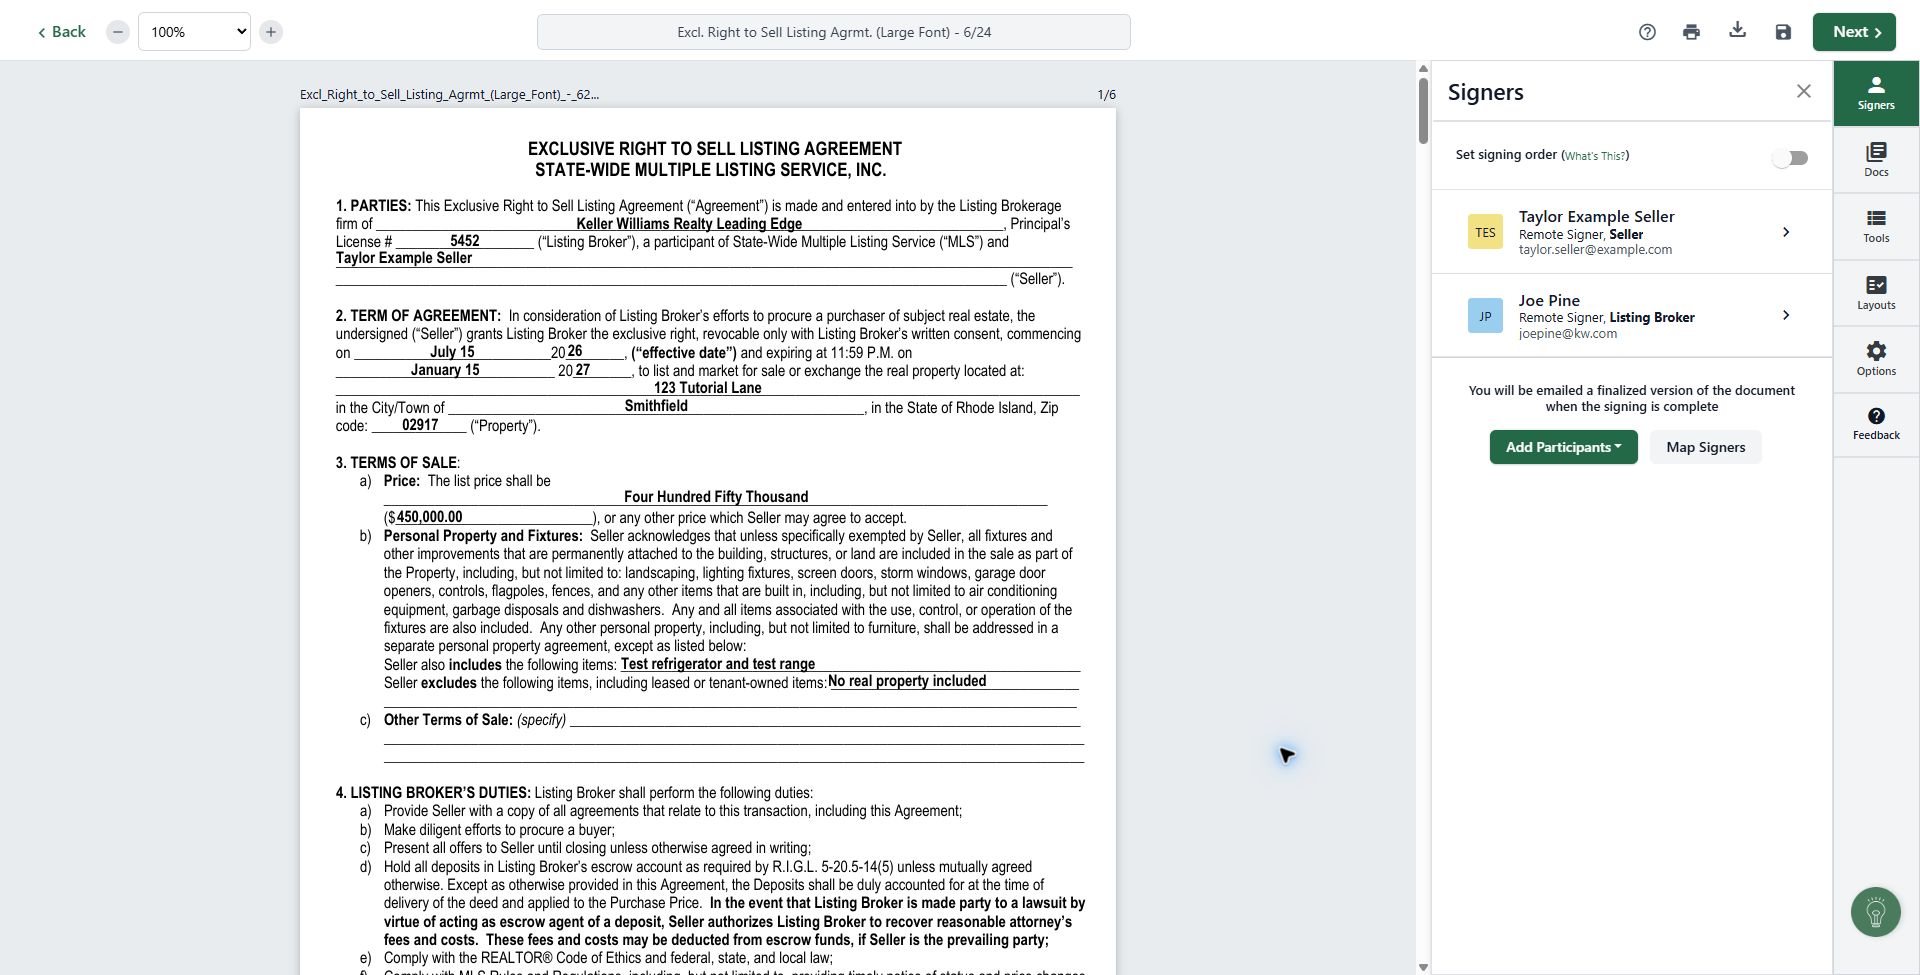
Review the signature blocks
Confirm every required signature, initial, and date block is assigned to the correct participant. Click Next only when the package is ready.
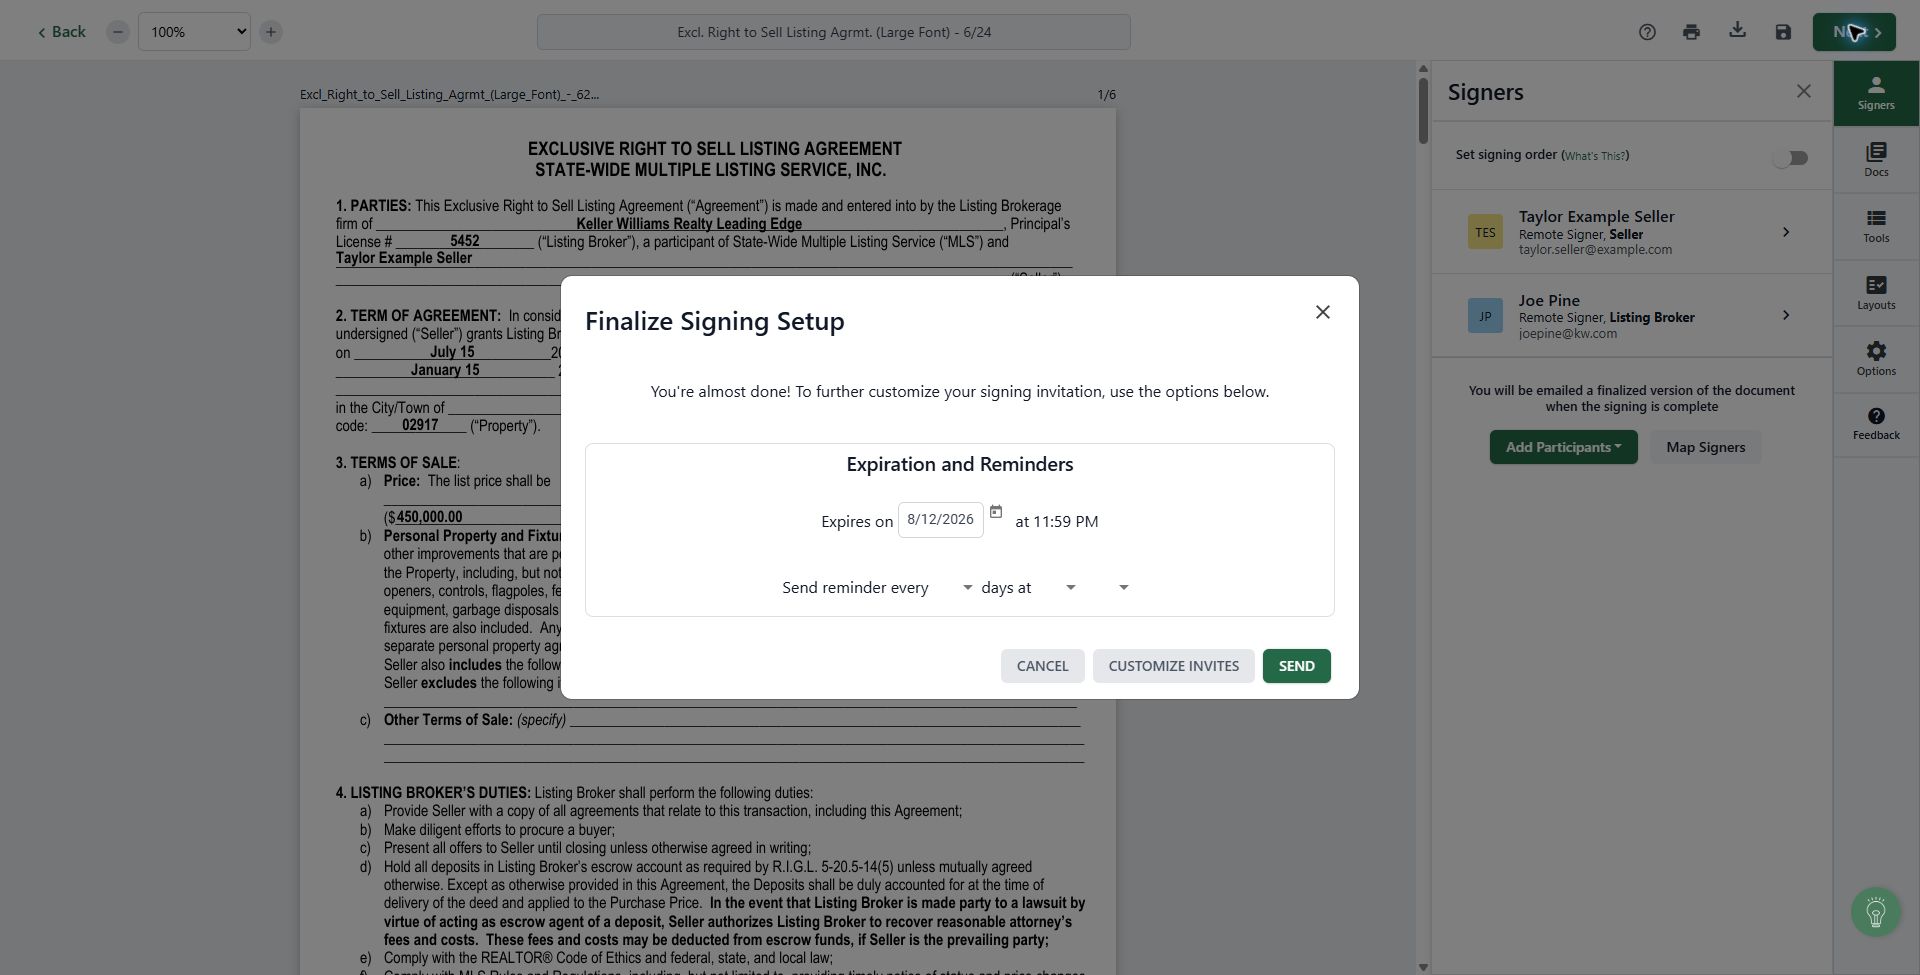
Finalize and send
Review the expiration and reminder settings. Customize the invitation if needed, then click Send.
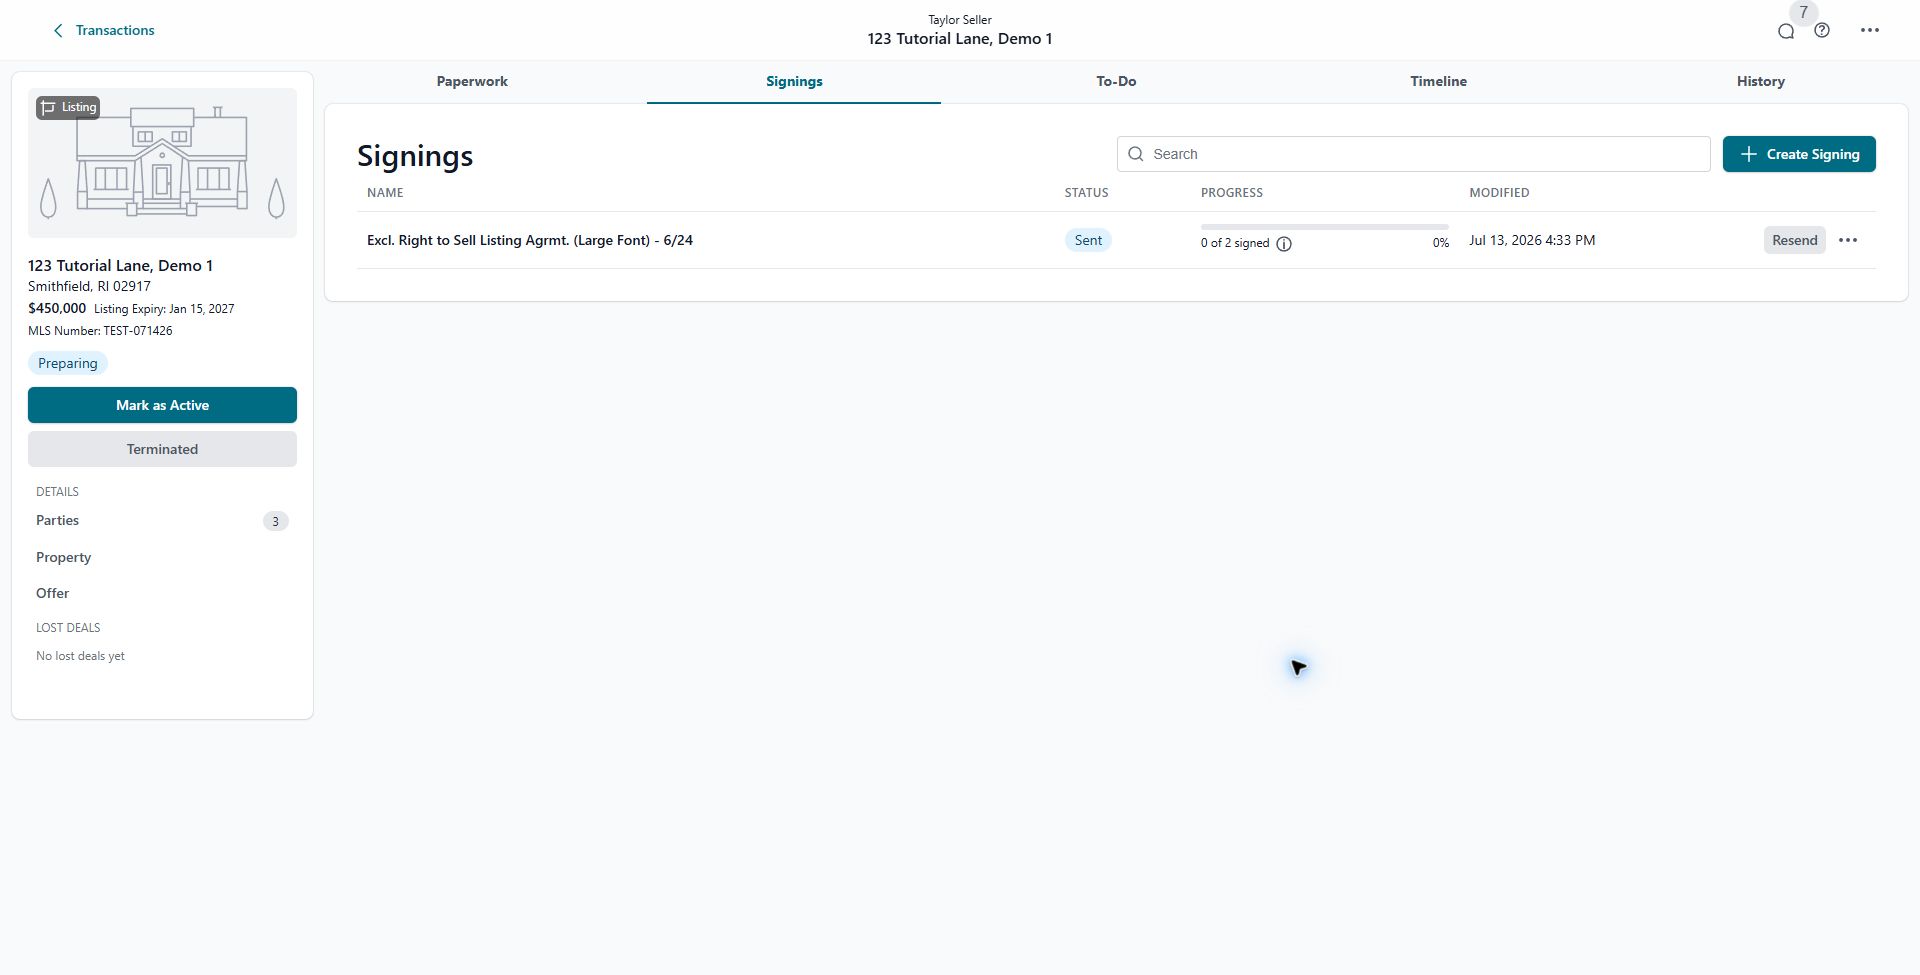
Monitor signing progress
The Signings tab shows whether the package was sent and how many participants have signed.
Download the executed documents
When the signing is complete, use the completed-signing email to download the fully executed documents to your computer. Save the files with clear names before returning to Command.
Return to the original Command Opportunity
Open the Opportunity that was previously connected to DocuSign, then go to its Documents tab. Do not create a duplicate Opportunity.
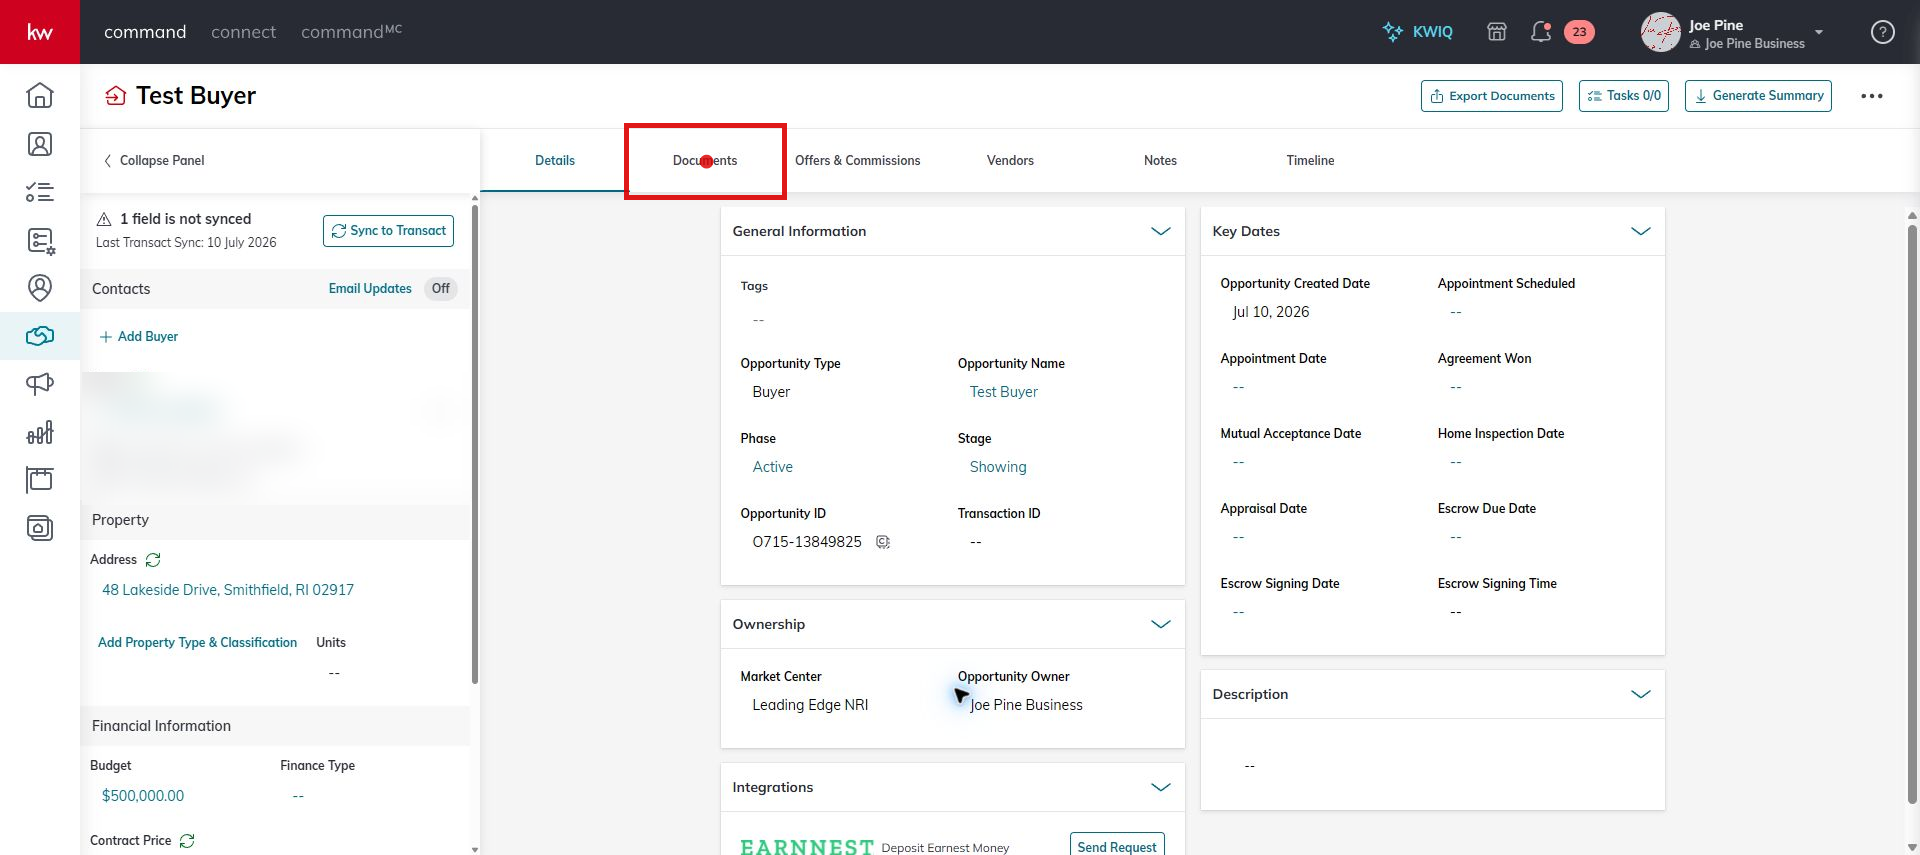
Attach the executed files
Find the correct compliance checklist item, choose Attach Files, and select the manual My Computer upload path.
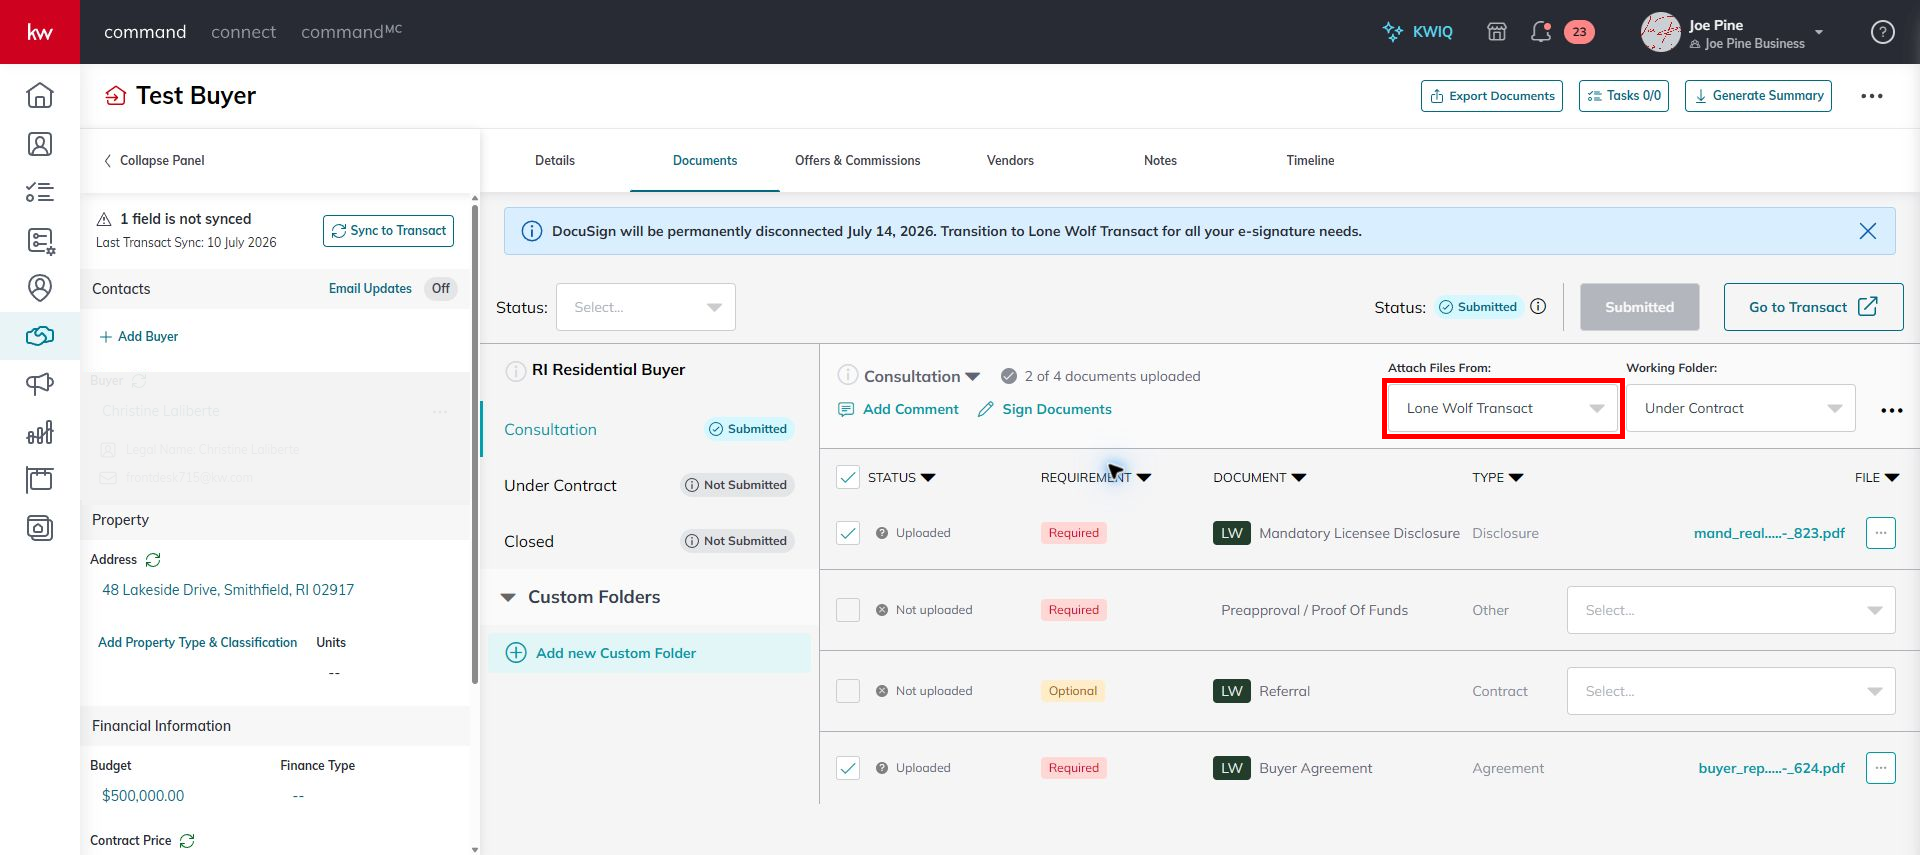
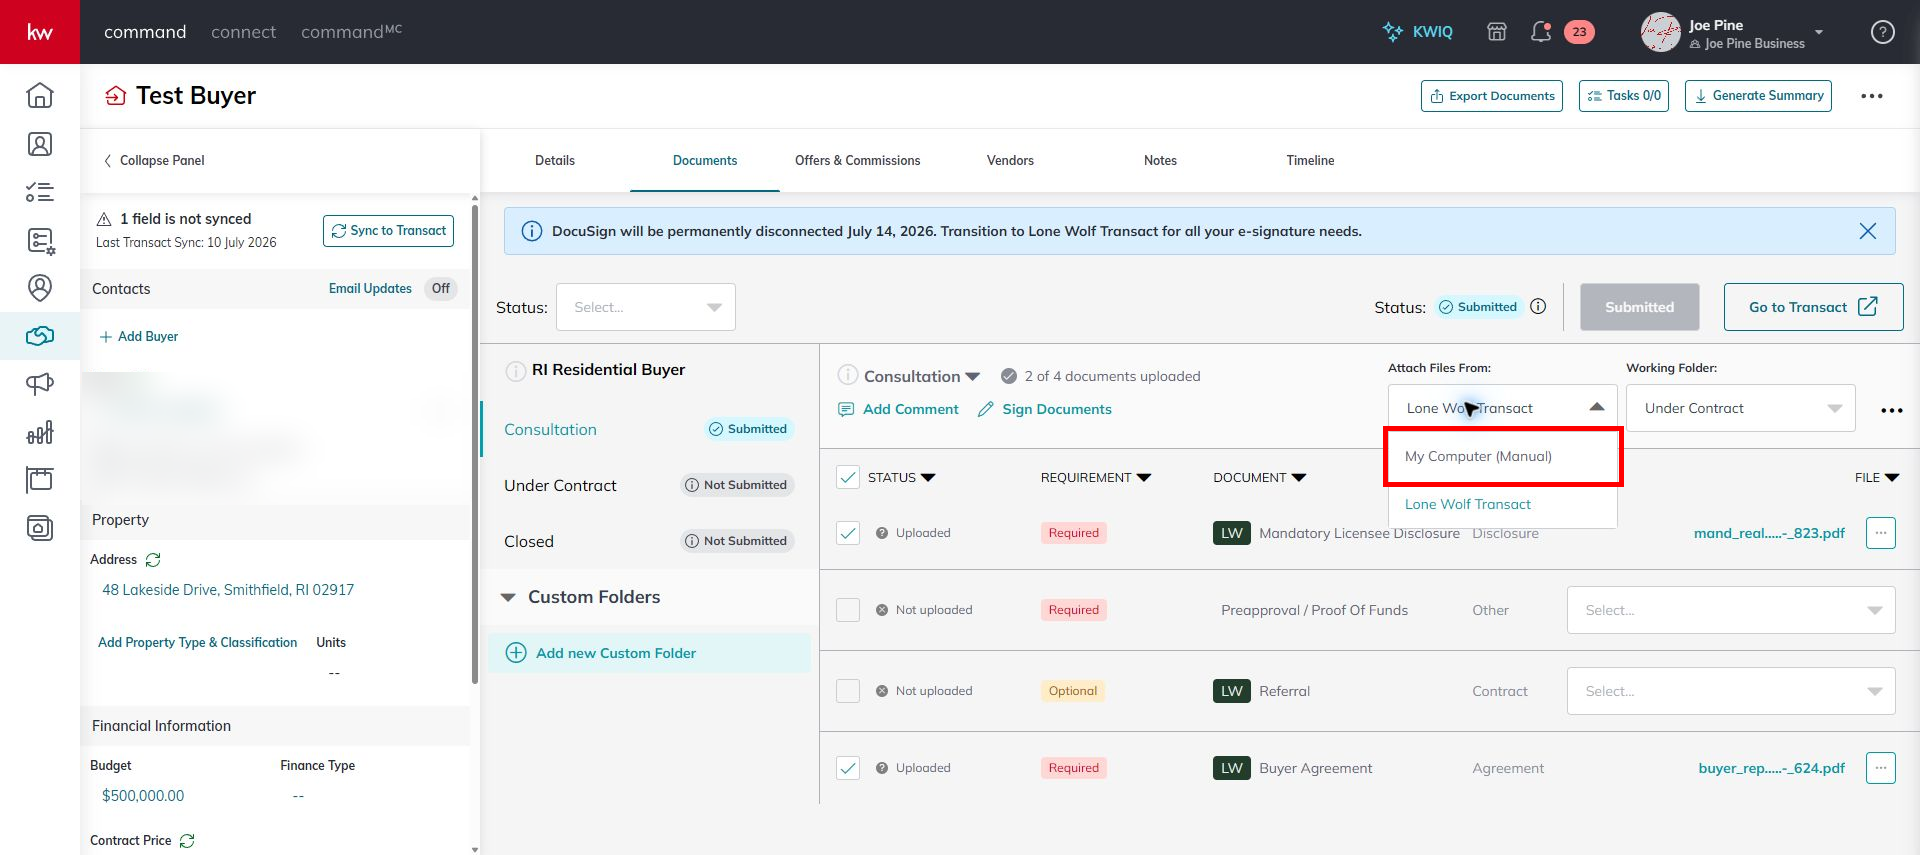
Choose My Computer
Select My Computer, browse to the executed documents you downloaded, and upload each file to its matching checklist item.
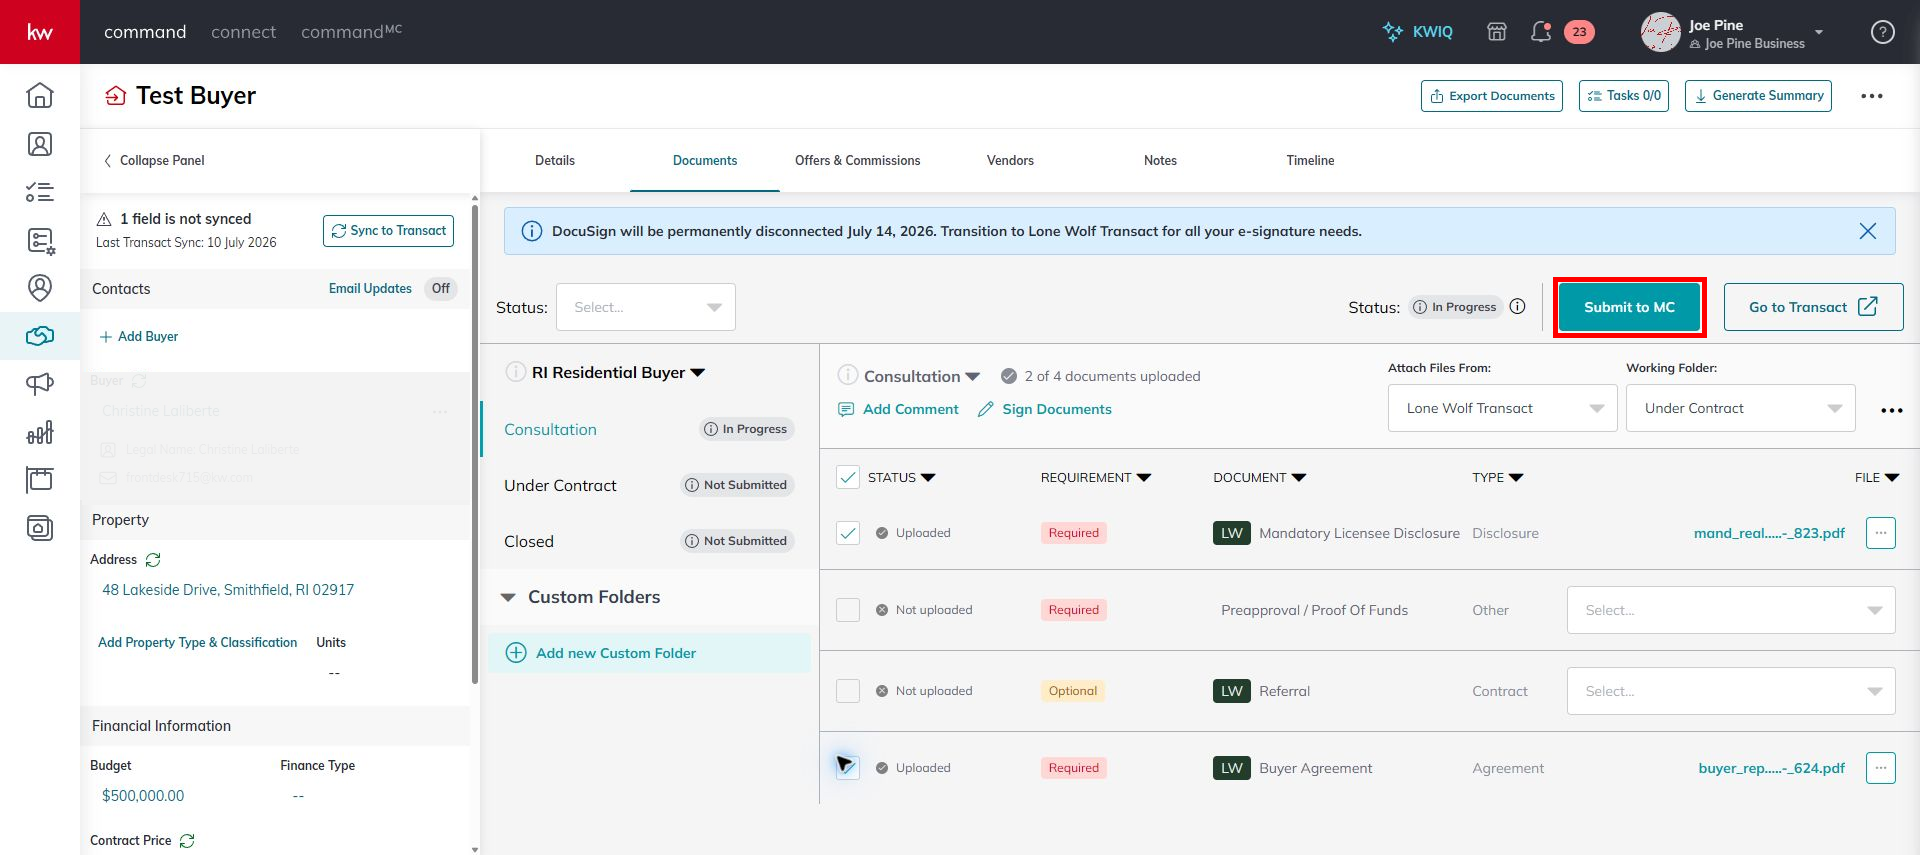
Select the completed checklist documents
Confirm every executed document is attached to the proper compliance item, then check the documents that are ready for review.
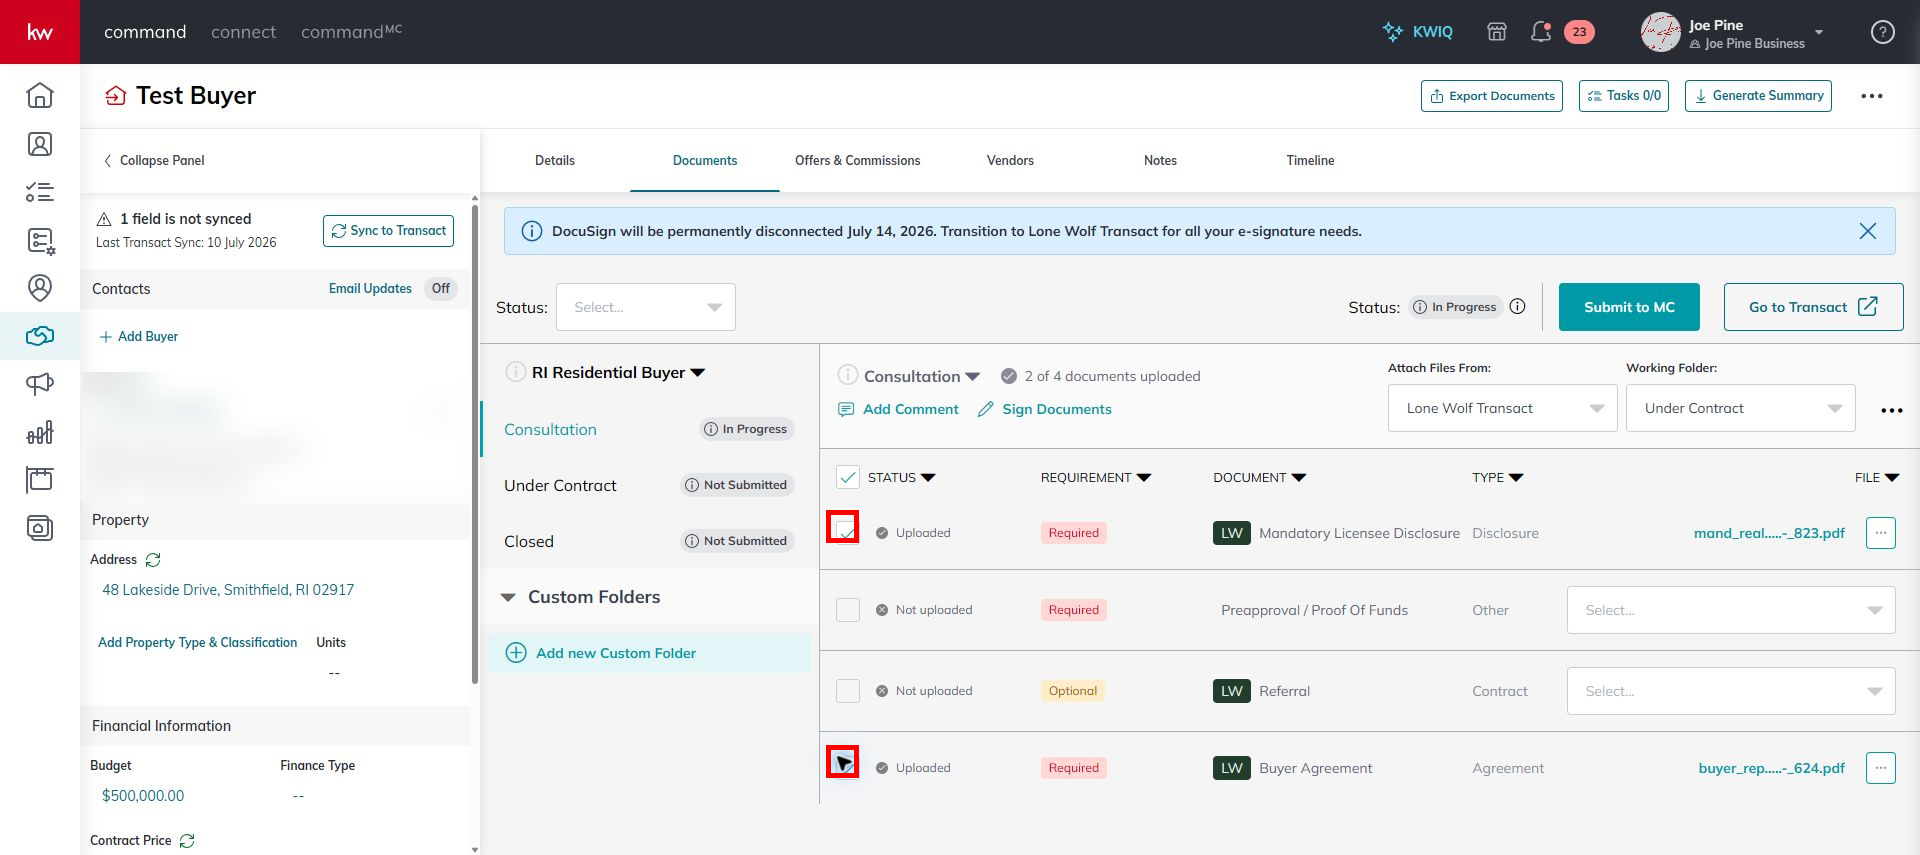
Submit to the Market Center
Click Submit to MC, review the confirmation, and submit the executed documents for compliance approval.
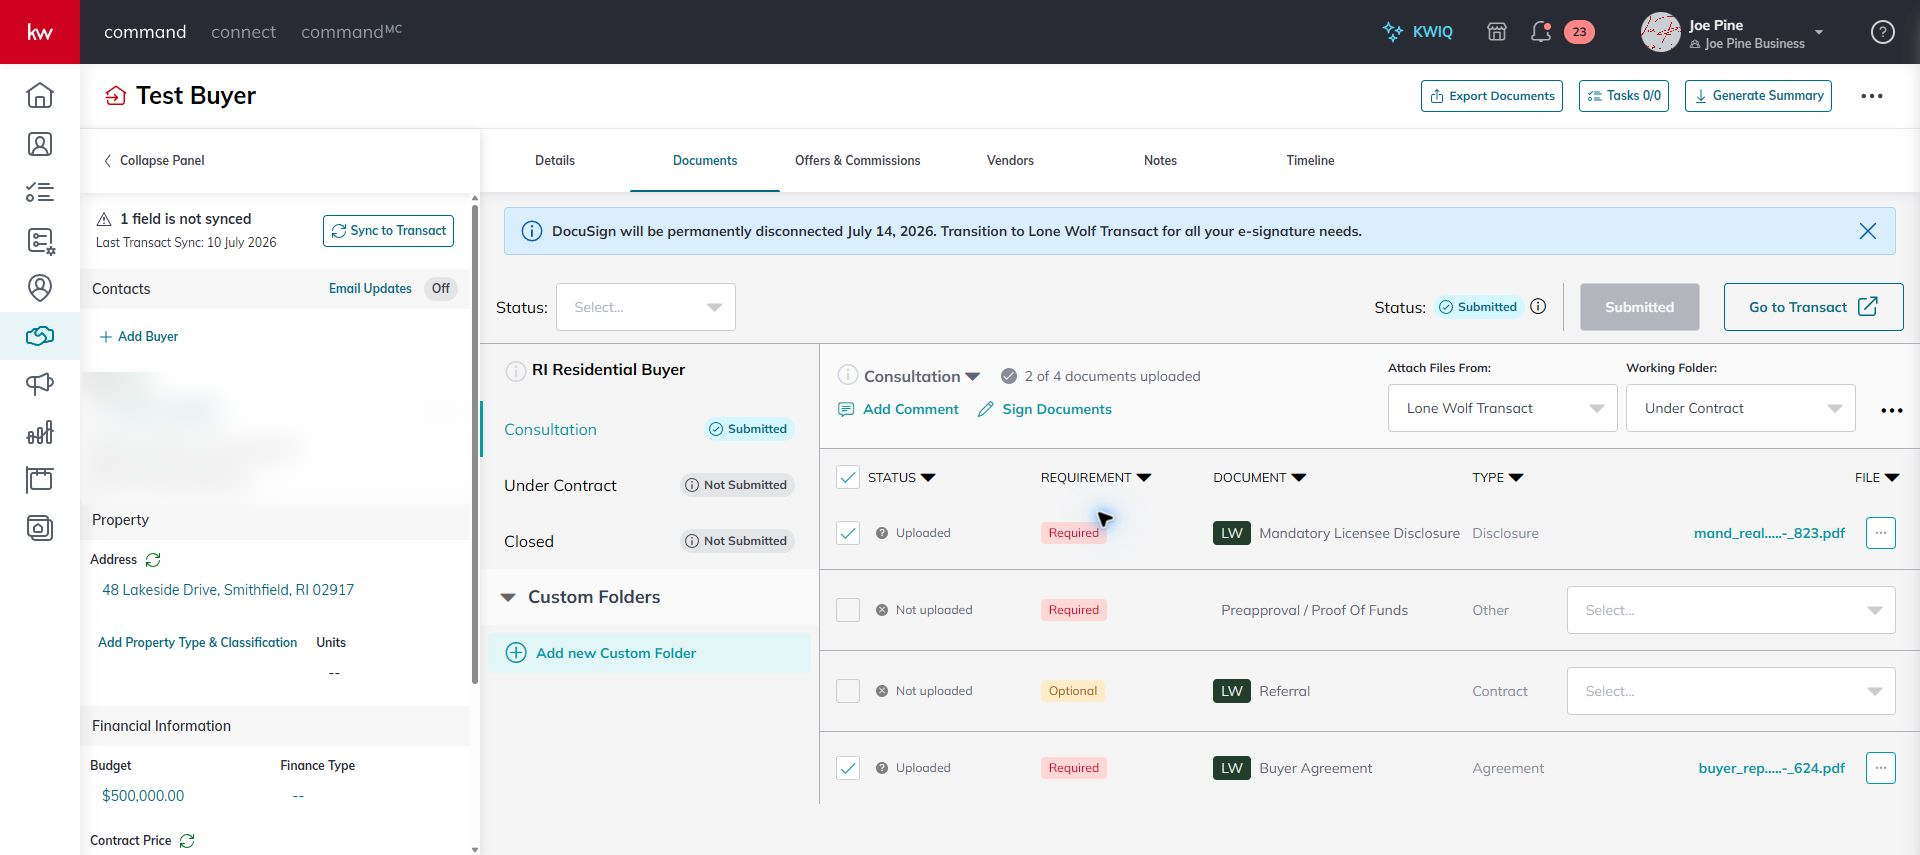
Verify the submission status
Confirm Command shows the checklist as submitted. Watch for Market Center feedback and correct any returned items before the transaction closes.
Official Resources
Lone Wolf help links
Review the start-to-finish Command and Lone Wolf workflow for new files.
Setup Create or connect Lone Wolf in CommandUse this if your Lone Wolf Transact account is not connected yet.
Create Create a Lone Wolf transaction from an OpportunityUse this for Opportunities that should sync with Lone Wolf from Command going forward.
Access Access the Lone Wolf transaction linked to an OpportunityUse this when a new Opportunity already has a linked Lone Wolf file.
Portal Open the Lone Wolf hubReturn to the portal hub for broader Lone Wolf FAQ and class resources.